Walkthrough (Not Finished - 74% Complete)
Table of Contents
Information
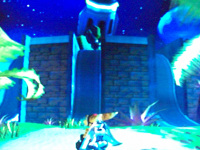
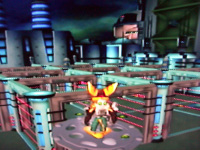
Planet Veldin, Kyzil Plateau
Planet Novalis, Tobruk Crater
Planet Kerwan, Metropolis
Planet Aridia, Outpost X11
Planet Eudora, Logging Site
Nebula G34, Blarg Station
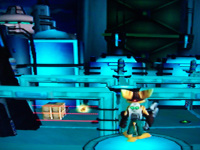
Planet Rilgar, Blackwater City
Planet Umbris, Qwark's HQ
Planet Batalia, Fort Krontos
Planet Gaspar, Blarg Depot
Planet Orxon, Kogar Refinery
Planet Pokitaru, Jowai Resort
Planet Hoven, Bomb Factory
Oltanis Orbit, Gemlik Base
Planet Oltanis, Gorda City Ruins
Planet Quartu, Robot Plant
Planet Kalebo III, Gadgetron Site
Veldin Orbit, Drek's Fleet
Planet Veldin, Kyzil Plateau
Information
The easiest way to beat the game involves spending a lot of bolts on missiles in the last level, which is good because I am extremely cheap when it comes to bolts. I recommend becoming very familiar with your wrench. I will tell you the location of every crate, light, mushroom, cactus, and anything else that may give you bolts. To avoid buying ammo or to get more bolts, it's a good idea to switch between planets to break the crates near the ship or replay levels.
The first time through the game, I buy six weapons to make life a little easier:
Pyrocitor, Blaster, Taunter, Devastator, Visibomb Gun, and the Tesla Claw.
All other weapons, I buy the second time through the game.
This guide will also show the locations of all of the Gold Bolts and Sand Mice, as well as describe the tasks to earn all of the Skill Points. Be sure to return to planets for gold bolts, skill points, and objectives as specified in the Come Back sections.
Let's get started, shall we:
Planet Veldin, Kyzil Plateau
Objectives:
--Investigate the crash site
Stuff:
Clank
0/0 Gold Bolts
0/0 Skill Points
--Investigate the crash site
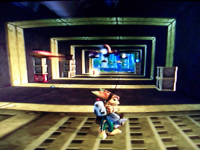
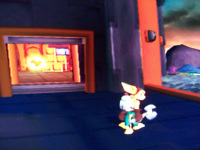
This is the first level, which you must investigate the crash site to find Clank. You may press Triangle to ignore the annoying help desk messages. First thing you want to do is look to the right for Ratchet's garage. Wrench the boxes inside with the Square Button. After, go down the ramp and kill the 2 frogs with your wrench. Then practice a Comet-Strike on one of the two sets of boxes. Hold L1 or R1 or both, and Press Square to throw your wrench at the boxes. The wrench will break the boxes and bring most of the bolts back to you. Get any bolts that the wrench did not pick up. And do it again on the other set of boxes. Throwing the wrench is great for getting boxes out of reach and striking enemies at a distance.
Next follow the path, jump over the ledge with the X Button, and practice the Comet-Strike on the frogs. If they come too close, just let go of the shoulder button(s) and press Square to whack them at close range. Bash the stack of boxes ahead for more bolts and go over the bridge. Wrench the frogs and break the boxes ahead. Jump over the ledges, wrench the frog, and try double jumping over these next gap by hitting the X Button twice. For the second gap, double jump across and press Square in the air to Hyper-Strike one of the frogs. Quickly wrench the other frog and smash the first set boxes. In the middle of two stacks of crates, there will be a blue orb inside a clear crate. This is a Nanotech crate with one Nanotech Sphere inside. Nanotech is your health in this game. Click the L3 button to view your health or bolts when it goes away. Notice you only have four spheres of health. Now you may break the crates and go wrench the frog.
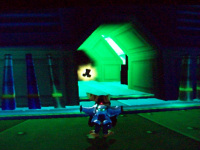
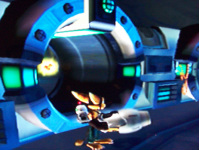
At the fork, take a right for more boxes and frogs. Wrench them, get any leftover bolts and go back to the fork. Continue ahead on the left path. Double jump overhead the blue robot and Hyper-Strike him. Then notice the Gadgetron Crates on the right. Break these and they will give you ammo for your Bomb Glove. Because of the cost for ammo, I do not recommend using the Bomb Glove at all until you need it for the Gold Bolts in the future. Throw your wrench at the frog and Hyper-Strike the next robot. Break the boxes and continue along the path. The next robot will run away. Get the ammo crate on the way to Hyper-Strike the robots in sequence using single jumps. Break the boxes and then attack the robots on the other side of the circular doorway. There are four areas with crates. Smash them, get any leftover bolts, and follow the path to find Clank in the rubble.
--Investigate the crash site
Stuff:
Clank
0/0 Gold Bolts
0/0 Skill Points
--Investigate the crash site
This is the first level, which you must investigate the crash site to find Clank. You may press Triangle to ignore the annoying help desk messages. First thing you want to do is look to the right for Ratchet's garage. Wrench the boxes inside with the Square Button. After, go down the ramp and kill the 2 frogs with your wrench. Then practice a Comet-Strike on one of the two sets of boxes. Hold L1 or R1 or both, and Press Square to throw your wrench at the boxes. The wrench will break the boxes and bring most of the bolts back to you. Get any bolts that the wrench did not pick up. And do it again on the other set of boxes. Throwing the wrench is great for getting boxes out of reach and striking enemies at a distance.
Next follow the path, jump over the ledge with the X Button, and practice the Comet-Strike on the frogs. If they come too close, just let go of the shoulder button(s) and press Square to whack them at close range. Bash the stack of boxes ahead for more bolts and go over the bridge. Wrench the frogs and break the boxes ahead. Jump over the ledges, wrench the frog, and try double jumping over these next gap by hitting the X Button twice. For the second gap, double jump across and press Square in the air to Hyper-Strike one of the frogs. Quickly wrench the other frog and smash the first set boxes. In the middle of two stacks of crates, there will be a blue orb inside a clear crate. This is a Nanotech crate with one Nanotech Sphere inside. Nanotech is your health in this game. Click the L3 button to view your health or bolts when it goes away. Notice you only have four spheres of health. Now you may break the crates and go wrench the frog.
At the fork, take a right for more boxes and frogs. Wrench them, get any leftover bolts and go back to the fork. Continue ahead on the left path. Double jump overhead the blue robot and Hyper-Strike him. Then notice the Gadgetron Crates on the right. Break these and they will give you ammo for your Bomb Glove. Because of the cost for ammo, I do not recommend using the Bomb Glove at all until you need it for the Gold Bolts in the future. Throw your wrench at the frog and Hyper-Strike the next robot. Break the boxes and continue along the path. The next robot will run away. Get the ammo crate on the way to Hyper-Strike the robots in sequence using single jumps. Break the boxes and then attack the robots on the other side of the circular doorway. There are four areas with crates. Smash them, get any leftover bolts, and follow the path to find Clank in the rubble.

You may be able to skip the videos by pressing the Start Button. Clank will start Ratchet's ship with his Robotic Ignition System, and they will fly to Planet Novalis.
Planet Novalis, Tobruk Crater
Objectives:
--Find a new ship
--Explore the waterworks
Stuff:
Infobot to Planet Kerwan from the Chairman
New Ship
Infobot to Planet Aridia from the Plumber for 500 Bolts
Pyrocitor for 2,500 Bolts (Recommended)
2/3 Gold Bolts
0/1 Skill Points
--Find a new ship
Press the X Button to bring down the auto-save information. First I will tell you how to find Gold Bolt #1, and then go for the ship. Turn around to the right, get the ammo crate, and cross the ship's pad. Cross the water and get the boxes. Then jump in the water and press and hold the Square button to dive for a few bolts. Watch the air meter on the right. If the bubbles go down, you drown. Press and hold the X button to rise, and press X one more time to jump out onto the ledge with the Bolt Crank. Break the boxes, and turn the Bolt Crank by pressing Square next to it and moving counter-clockwise with the Left Analog Stick.
--Find a new ship
--Explore the waterworks
Stuff:
Infobot to Planet Kerwan from the Chairman
New Ship
Infobot to Planet Aridia from the Plumber for 500 Bolts
Pyrocitor for 2,500 Bolts (Recommended)
2/3 Gold Bolts
0/1 Skill Points
--Find a new ship
Press the X Button to bring down the auto-save information. First I will tell you how to find Gold Bolt #1, and then go for the ship. Turn around to the right, get the ammo crate, and cross the ship's pad. Cross the water and get the boxes. Then jump in the water and press and hold the Square button to dive for a few bolts. Watch the air meter on the right. If the bubbles go down, you drown. Press and hold the X button to rise, and press X one more time to jump out onto the ledge with the Bolt Crank. Break the boxes, and turn the Bolt Crank by pressing Square next to it and moving counter-clockwise with the Left Analog Stick.
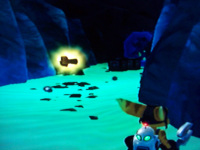
Go through the doors, get the boxes, and climb the steps. Hit some mushrooms and spiked rocks on the path for more bolts. Hyper-Strike the yellow robots ahead and make sure you have gotten all bolts from the boxes, mushrooms, rocks, and enemies. After breaking the ammo crate, it should be safe to assume that you have filled up the ammo for the Bomb Glove. Next, jump into the deep water, dive down, get the bolts at the bottom if you want, and swim through the tunnel. After surfacing on the other side, walk along the rim for bolts and some boxes. Jump down and collect the bolts on the rims of the lower pools. Jump down and wrench the two bee things. Hit the mushrooms, rocks, and boxes, and get out your Bomb Glove by holding Triangle and selecting it. If your facing the door, look to the left for some cracked rocks in the wall. Throw a bomb at it by pressing Circle, and go inside for Gold Bolt #1 and some boxes. Go back, turn the Bolt Crank, and go through the door. Wrench the mushroom on the left, collect the bolts, and swim down through the tunnel. Surface and get the crates and mushrooms. Climb up, go to where you started and activate the vendor by pressing Triangle.
 |
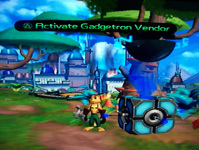 |
If you have enough bolts, buy the Pyrocitor for 2,500 Bolts, so that you can start collecting ammo for it. After, jump onto the yellow elevator to the left. Wrench the boxes on the left and all other enemies and boxes in sight until you come to some steps with a yellow robot on them. Some spare bolts string around the first little hill, and on the left. Most crates are near the buildings. Once at the steps, kill the yellow robot on the steps and all others to the right. Look ahead underneath the bridge for more boxes. Go around the corner to find the first Sand Mouse and the tunnel that leads to Gold Bolt #3. You cannot use the Sand Mouse until you get the Sonic Summoner (Aridia), so go back and up the steps. Wrench the robot, get the crates on the right, and go through the door. There is a stack of boxes and an ammo crate to the left. After smashing them go out to the bridge. The bridge will blow up and drop three robots. Bomb Glove them as you move across. At the end, get the ammo crate on the left and go down the steps. Before having at the enemies, go around both sides of the building to find a bunch of bolts and boxes. Wrench the enemies ahead and the crates on the right. At the end, a ship will fly down with three robots. Defeat them for a Ship and an Infobot for Planet Kerwan from the Chairman. Then circle around for a bunch of crates, and go over the new bridge to the yellow elevator.
--Explore the Waterworks
If you haven't bought the Pyrocitor, do so with Gadgetron Vendor on the left for 2,500 Bolts. Once you have it, continue through the door to the Waterworks. Jump to the top, get a crate and jump across to the yellow lifts. Kill the two bees and get the crates. Before going up the steps, wall jump by jumping towards the wall and pressing X as you touch the next wall in the slot. At the top you will find Gold Bolt #2.
 |
 |
Jump down and continue up the steps. Hyper-Strike the yellow robot and jump across the trench. Hyper-Strike another robot, break the crates ahead, and use the lift on the right. In the next room, get the crates and ammo crate to the right and then jump across the trench, using the steps at the end to get out if you fall in. Go to the other side of the middle island, getting the three bolts as you cross. Then use the steps on the other side to get up the final time. Go to the right, get the boxes at the end, and then climb the yellow lifts. Follow the upper path, getting the boxes as you go. Next you will meet the Plumber who has an Infobot to Planet Aridia. After buying the Infobot for 500 Bolts, bust the crates to the far left and far right. Jump down the sewer to quickly return to your ship. Press Triangle to enter the ship and fly to Planet Kerwan. Make sure to return for the Come Backs.

Come Back!
1/3 Gold Bolts
1/1 Skill Points
a) With: Devastator (Batalia)
For: Skill Point #1 (Take Aim)
b) With: Hydro-Pack (Hoven) and O2 Mask (Pokitaru)
For: Gold Bolt #3
----------------------------------------------------------------------------------------------------------------------------------------------------------------------------------
a) Come back with the Devastator and stand by the elevator. Shoot down one of the planes for Skill Point #1 (Take Aim).

b) Come back with the Hydro-Pack,
look off the cliff to find the river, and glide down to it. Follow the
riverbank or turbo-swim up the river into the tunnel at the end.
On the other side, there is a mushroom on the left, boxes on the
right, and an ameboid for you to Pyrocitor. Go down the right and wall
jump up for some crates. Continue to find another room on
the right with the Gold Bolt on the ledge. If you defeat the enemy with the boxes in tact, then boost jump up for Gold Bolt #3. If
the crates were destroyed, you need to continue through the tunnel to the next room. In the large room, kill all of the
enemies, smash all of the crates, and climb the ladder and
steps to reach Gold Bolt #3.
 |
 |
 |
 |
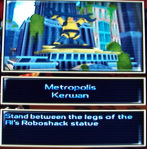
Planet Kerwan, Metropolis
Objectives:
--Visit Al's Roboshack
--Buy Heli-Pack from Al
--Explore the rest of the city
--Ride the Robot Train
--Buy Swingshot from trainer
Stuff:
Blaster for 2,500 Bolts (Recommended)
Heli-Pack from Al for 1,000 Bolts
Infobot to Planet Eudora
Swingshot from trainer for 1,000 Bolts
3/3 Gold Bolts
1/3 Skill Points
--Visit Al's Roboshack
Go to the right for some boxes, and then proceed down the golden pathway to the vendor. Buy the Blaster, but not any ammo. Go to the left for three streetlights and two crates. Turn all the way back around, and throw the wrench at the explosive crates under the golden pathway. Continue in that direction, get the other streetlight near the tree on the far left. Next, go down the pathway with the streetlights, dog, and red guy. Use the wrench on them and the streetlights along the way. There are crates ahead and ammo on the right. After, continue along the path toward another round of lights and enemies. One red guy will run away and be protected by a chopper over the bridge. Right here, across from the bridge is a hidden ledge with crates and lights inside. After you buy the Heli-Pack, come back and boost jump up for some easy bolts.
--Visit Al's Roboshack
--Buy Heli-Pack from Al
--Explore the rest of the city
--Ride the Robot Train
--Buy Swingshot from trainer
Stuff:
Blaster for 2,500 Bolts (Recommended)
Heli-Pack from Al for 1,000 Bolts
Infobot to Planet Eudora
Swingshot from trainer for 1,000 Bolts
3/3 Gold Bolts
1/3 Skill Points
--Visit Al's Roboshack
Go to the right for some boxes, and then proceed down the golden pathway to the vendor. Buy the Blaster, but not any ammo. Go to the left for three streetlights and two crates. Turn all the way back around, and throw the wrench at the explosive crates under the golden pathway. Continue in that direction, get the other streetlight near the tree on the far left. Next, go down the pathway with the streetlights, dog, and red guy. Use the wrench on them and the streetlights along the way. There are crates ahead and ammo on the right. After, continue along the path toward another round of lights and enemies. One red guy will run away and be protected by a chopper over the bridge. Right here, across from the bridge is a hidden ledge with crates and lights inside. After you buy the Heli-Pack, come back and boost jump up for some easy bolts.
Use the Blaster and the L1 Button to take out the chopper. Then get the lights as you cross the bridge, the enemies and boxes on the other side, and the ammo crate way ahead behind some trees. Go back, take the escalator on the left, and kill the enemies at the bottom. Be sure not to step on any mines laid by the robot. Smash the streetlights and boxes in the circle. Wrench the ornament in the middle for a few more bolts. Afterwards, go down the ramp and wrench the enemies and streetlights.
--Buy the Heli-Pack from Al
Now go into Al's Roboshack to buy the Heli-Pack for 1,000 Bolts.
--Explore the rest of the city
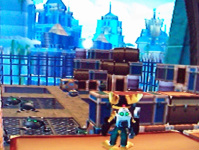
From Al's Roboshack, move straight through and get the ammo to the left and ahead of you. Then Boost Jump up the ledge by pressing R1 to crouch, and then the X Button to jump. Once more, and then Stretch Jump by running forward and pressing R1 and X together. There is ammo to the left if you need it. Either way, use the elevator, bash the boxes, and Glide off the perch by double jumping and holding the X Button on the way down. Take out the enemies with the Blaster and then get the ammo by the wall. Ride the long elevator up for more crates and enemies to destroy with your Blaster. Before going on the bridge, Glide off of the left edge to get under Al's Roboshack statue's legs. This will give you Skill Point #2 (Striking a Pose). Then go back up the long elevator.
--Buy the Heli-Pack from Al
Now go into Al's Roboshack to buy the Heli-Pack for 1,000 Bolts.
--Explore the rest of the city
From Al's Roboshack, move straight through and get the ammo to the left and ahead of you. Then Boost Jump up the ledge by pressing R1 to crouch, and then the X Button to jump. Once more, and then Stretch Jump by running forward and pressing R1 and X together. There is ammo to the left if you need it. Either way, use the elevator, bash the boxes, and Glide off the perch by double jumping and holding the X Button on the way down. Take out the enemies with the Blaster and then get the ammo by the wall. Ride the long elevator up for more crates and enemies to destroy with your Blaster. Before going on the bridge, Glide off of the left edge to get under Al's Roboshack statue's legs. This will give you Skill Point #2 (Striking a Pose). Then go back up the long elevator.
 |
 |
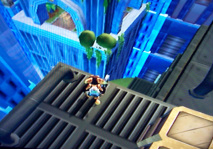
Cross the long bridge, smash the crates on both sides, and go up the escalator. Blast the first enemy, and then boost jump up the ledge on the right. Destroy the enemies below, and make your way up to Gold Bolt #4.
 |
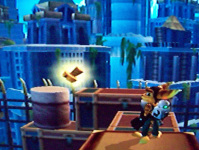 |
Don't forget the ammo crate on top, the stack of crates under the Gold Bolt, and that there is a Sand Mouse hidden in the corner. After finishing up here, go back over the ledge. Kill the enemies ahead and climb the crates on the left for the boxes on along top. Then jump down, finish off any leftover boxes, especially the wall of boxes, and get on the Robot Train.
--Ride the Robot Train
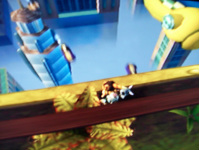
Get the enemies and crates, jump the gaps, and reach the front. The train will pull over. Blast the robot on the right and then go to the left for a ton of crates. Then go back out, watch for any bombs on the ground, and follow the path. In another doorway on the left, you will find and Infobot to Planet Eudora. Before getting on the elevator, Glide off the ledge to the right for more crates and jump down. Go back to the hidden ledge on the right (mentioned before) and boot jump up for more streetlights and boxes. Then go back to the ship area. Look off of the edge for some traffic moving underneath you. Then jump down and glide into the tunnel for Gold Bolt #5 and some crates. You may throw the wrench at as many cars as you like. Then take the taxi back to the ship.
--Ride the Robot Train
Get the enemies and crates, jump the gaps, and reach the front. The train will pull over. Blast the robot on the right and then go to the left for a ton of crates. Then go back out, watch for any bombs on the ground, and follow the path. In another doorway on the left, you will find and Infobot to Planet Eudora. Before getting on the elevator, Glide off the ledge to the right for more crates and jump down. Go back to the hidden ledge on the right (mentioned before) and boot jump up for more streetlights and boxes. Then go back to the ship area. Look off of the edge for some traffic moving underneath you. Then jump down and glide into the tunnel for Gold Bolt #5 and some crates. You may throw the wrench at as many cars as you like. Then take the taxi back to the ship.
 |
 |
Take the golden path towards the vendor and head left to the Qwarkbot statue. Then make a quick run around the first island for bolts and boxes before climbing it. Get the crates on the way to and at the top. Then stand on the green target and jump to slide down the cable on Ratchet's wrench. Jump across the platform and run around the second island for another string of bolts. Then make your way to the top. Wrench the first set of boxes, and look off the edge by the second set for a building ledge below on the right. Get the crates and glide to that ledge for Gold Bolt #6 and a ton of boxes. Unfortunately, you must take the taxi to the ship and then return to the second island.
 |
 |
After coming back to the second island, zip-line down to the third island.
--Buy Swingshot from the trainer
It will be 1,000 Bolts. Then get the bolts and crates to the left, and jump down for two more strings of bolts. Afterwards, press and hold circle to Swingshot to the next platform with a few more boxes. Swingshot to the last platform for the last crates and the last zip-line. Return to the ship and fly to Planet Aridia. Don't forget to Come Back with the Devastator for two more Skill Points.
Come Back!
2/3 Skill Points
a) With: Devastator (Batalia)
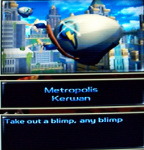
For: Skill Point #3 (Blimpy)
b) With: Devastator (Batalia)
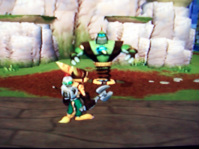
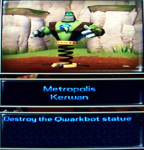
For: Skill Point #4 (Qwarktastic)
----------------------------------------------------------------------------------------------------------------------------------------------------------------------------------
a) Come Back with the Devastator to shoot down a blimp for Skill Point #3 (Blimpy). The best place I found to do this is on top of the first island. It would be a good idea to get Skill Point #4 (Qwarktastic) on the way.
--Buy Swingshot from the trainer
It will be 1,000 Bolts. Then get the bolts and crates to the left, and jump down for two more strings of bolts. Afterwards, press and hold circle to Swingshot to the next platform with a few more boxes. Swingshot to the last platform for the last crates and the last zip-line. Return to the ship and fly to Planet Aridia. Don't forget to Come Back with the Devastator for two more Skill Points.
Come Back!
2/3 Skill Points
a) With: Devastator (Batalia)
For: Skill Point #3 (Blimpy)
b) With: Devastator (Batalia)
For: Skill Point #4 (Qwarktastic)
----------------------------------------------------------------------------------------------------------------------------------------------------------------------------------
a) Come Back with the Devastator to shoot down a blimp for Skill Point #3 (Blimpy). The best place I found to do this is on top of the first island. It would be a good idea to get Skill Point #4 (Qwarktastic) on the way.
 |
 |
b) Come Back with the Devastator and shoot the Qwarkbot statue for Skill Point #4 (Qwarktastic).
 |
 |
Planet Aridia, Outpost X11
Objectives:
--Locate Skid McMarx
--Help Skid get to his ship
--Use your Swingshot
--Find Skid's agent
Stuff:
Z3000 Hoverboard
Trespasser
3/4 Gold Bolts
1/2 Skill Points
--Locate Skid McMarx
Turn around, and go down the path behind your ship. You will find Skid, who offers a hoverboard if you help him to his ship.
--Help Skid get to his ship
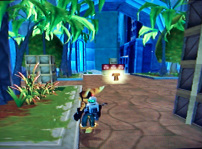
Wrench the cactus to the right of his ship. Turn left and cross the platform over the quicksand. If you do fall in, you can jump out twice. Use the Pyrocitor on the first set of sand sharks. Then move to the right to take out the yellow thing that spits out more sand sharks. There are ammo crates on the left and a cactus on the right. Get them and then continue forward across the first platform. If you need health, throw the wrench at it on the left, and continue across the second platform. Pyro the enemies, get the crates, and take out the Bomb Glove. Throw a bomb at the cracked rocks in the wall on the right. Go in the cave for Gold Bolt #7 and some ammo. Exit the cave, cross the platform, and go right.
--Locate Skid McMarx
--Help Skid get to his ship
--Use your Swingshot
--Find Skid's agent
Stuff:
Z3000 Hoverboard
Trespasser
3/4 Gold Bolts
1/2 Skill Points
--Locate Skid McMarx
Turn around, and go down the path behind your ship. You will find Skid, who offers a hoverboard if you help him to his ship.
--Help Skid get to his ship
Wrench the cactus to the right of his ship. Turn left and cross the platform over the quicksand. If you do fall in, you can jump out twice. Use the Pyrocitor on the first set of sand sharks. Then move to the right to take out the yellow thing that spits out more sand sharks. There are ammo crates on the left and a cactus on the right. Get them and then continue forward across the first platform. If you need health, throw the wrench at it on the left, and continue across the second platform. Pyro the enemies, get the crates, and take out the Bomb Glove. Throw a bomb at the cracked rocks in the wall on the right. Go in the cave for Gold Bolt #7 and some ammo. Exit the cave, cross the platform, and go right.
 |
 |
Pyro the sand shards on the ground and any that fall from above. Then climb the ledges on the left to the top of the center island. Wrench the two yellow things, sand sharks, and crates. Drop back down where you were, walk forward, and Pyro more enemies on the left. Get the ammo to the right of the final platform, and then attack the last of the enemies on the other side. Skid will give you a Z3000 Hoverboard. Get the crates above, the cacti above and below, and any remaining bolts. Climb back up the steps, go through the ship, and get the boxes on the right and ahead. Finally, jump onto the crane elevator to take you back down to the ship area.
--Find Skid's agent
Move forward to smash the few crates by the teleporter on the right. Then take the path in front of the ship. Wrench the 4 sand sharks, pyro-guy, and crates on both sides. Get the cactus on the left, jump the quicksand gap, and Pyro the various enemies near the circular platform ahead. Wrench the cacti and boxes along the rock wall, and then wrench the 2 pyro-guys. Get the nanotech crate on the edge along with the cacti on the left rock wall. Move onto the next section to Pyro the enemies, smash the crates and cacti, and collect the bolts. Some of the cacti are in the rocks above. When you're done, get on the elevator. You are now at the fork between two objectives so remember this spot, and check the map if necessary. First, get the strand of bolts and the ammo crate, and then go down the path on the right.
Blast or wrench the pyro-guy, and then do the same for the next enemy across the gap. Follow the conveyor belt to another pyro-guy and some more boxes. Comet-Strike the pyro-guy on top of the left ledge and jump up it. Move against the next conveyor belt for more of the same. Get the string of bolts next to the elevator, and then ride it down. Exit to the left, smash the crates, and pick up the bolts. Jump the gap to Pyro some sand sharks and pyro-guy. Smash the crates in the corner ahead, and climb up on the left to drop down on the other side. Destroy the various explosive crates and pyro-guys, then boost jump back up the ledge, and climb the right ledge.
Go into each tube to wrench a sand shark and then attack the pyro-guy on the other side. Get the ammo crate and follow the wall ahead to a ledge on the right. Jump up and move along the ledge to the right until you can jump up. Throw your wrench at the stack of crates, collect the bolts, and climb the ladder on the right. Bust the crates, look behind you, and stretch jump to the platform for ammo and bolts. Stretch jump back and jump over the ledge on the left. Look to the right of the elevator to identify a corner platform.
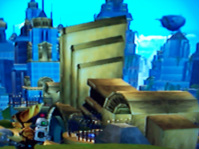
Stretch jump to the corner. Then stretch jump to the island, and go to the bed of the truck on the left for Gold Bolt #8. If you short it, you
are able to jump forward twice before dying.
 |
 |
Return to the platform with the elevator. Now continue across the quicksand gap for a few bolts and Skid's agent. For future reverence there is a sand mouse on the ground near him, but you cannot use it yet. Use the teleporter on the right to return to the ship. Then make your way back to the fork.
--Use your Swingshot
Now, use the left path. Jump down for a few bolts and swingshot up the ledge ahead. Collect the bolt on both sides and break the crates ahead. Collect all of the bolts on top and all over below. At the top left corner are some explosive crates to throw the wrench at. Afterwards, climb back up and swingshot across for some boxes. Swingshot over the next gap, blow up the crate, and swing up to the ledge on the right. Break the boxes, swing to the conveyor belt on the left, and swing up to the ledge ahead. Break the nanotech crate, jump on the belt, and walk to the platform on the right. Smash the boxes, swing across, and get more crates. Swingshot across the next gap for more boxes. Swing to the next ledge, touch the box(es), and swing away. Go back for the bolts when they blow up. Then continue to the last ledge.
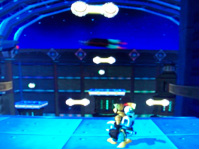
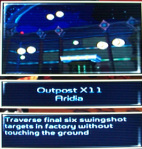
Now, you can go for a skill point. Swing across for the boxes ahead and swing back. Then swing across the next set of targets without touching the ground for Skill Point #5 (Swing It!).
--Use your Swingshot
Now, use the left path. Jump down for a few bolts and swingshot up the ledge ahead. Collect the bolt on both sides and break the crates ahead. Collect all of the bolts on top and all over below. At the top left corner are some explosive crates to throw the wrench at. Afterwards, climb back up and swingshot across for some boxes. Swingshot over the next gap, blow up the crate, and swing up to the ledge on the right. Break the boxes, swing to the conveyor belt on the left, and swing up to the ledge ahead. Break the nanotech crate, jump on the belt, and walk to the platform on the right. Smash the boxes, swing across, and get more crates. Swingshot across the next gap for more boxes. Swing to the next ledge, touch the box(es), and swing away. Go back for the bolts when they blow up. Then continue to the last ledge.
Now, you can go for a skill point. Swing across for the boxes ahead and swing back. Then swing across the next set of targets without touching the ground for Skill Point #5 (Swing It!).
 |
 |
Break the boxes and follow the bolts for the Trespasser. Jump and glide under the trespasser's platform to find Gold Bolt #9. Then walk to the edge of one of the flaps to swingshot back up.
Next, continue to the green pad. Stand on the Invinco-Lock Pad, and
press the Circle Button. The objective is to point the lasers into the
all of the receptors. Press the Up and Down D-Pad Buttons to move
between rings. Press the Right and Left D-Pad Buttons to spin the
rings.
I will provide you with each Trespasser Combination throughout the walkthrough.
These Trespasser Combinations are in the form (Outside Ring, Middle Ring, Inside Ring) with the specified Number of Turns and direction indicated by Clockwise (c) or Counter-Clockwise (cc) for each ring. If you mess up and still can't break it on your own, you must kill yourself to reset the lock.
Enter the combination (5cc, 5c, 3c). When the door opens, get the crates and go down the elevator. Exit to the right and go to the ship. Then fly to Planet Eudora.
Come Back!
Objectives:
--Bring prize to agent
1/4 Gold Bolts
1/2 Skill Points
a) With: Platinum Zoomerator (Rilgar)
For: Sonic Summoner
b) With: Devastator (Batalia)
For: Skill Point #6 (Transported)
c) With: Magneboots (Orxon)
For: Gold Bolt #10
----------------------------------------------------------------------------------------------------------------------------------------------------------------------------------
a) --Bring prize to agent
Once you win the hoverboard race on Planet Rilgar, you will receive the Platinum Zoomerator. Take the teleporter to Skid's Agent to be rewarded with the Sonic Summoner. This will allow you to conjure sand mice to help fight for you. They can be summoned more than once, and they can be found on the Sand Mouse Locations page.
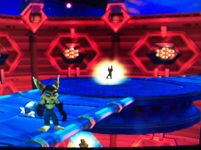
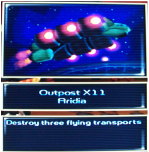
b) After acquiring the Devastator from Planet Batalia, return to shoot down three flying ships for Skill Point #6 (Transported).
I will provide you with each Trespasser Combination throughout the walkthrough.
These Trespasser Combinations are in the form (Outside Ring, Middle Ring, Inside Ring) with the specified Number of Turns and direction indicated by Clockwise (c) or Counter-Clockwise (cc) for each ring. If you mess up and still can't break it on your own, you must kill yourself to reset the lock.
Enter the combination (5cc, 5c, 3c). When the door opens, get the crates and go down the elevator. Exit to the right and go to the ship. Then fly to Planet Eudora.
Come Back!
Objectives:
--Bring prize to agent
1/4 Gold Bolts
1/2 Skill Points
a) With: Platinum Zoomerator (Rilgar)
For: Sonic Summoner
b) With: Devastator (Batalia)
For: Skill Point #6 (Transported)
c) With: Magneboots (Orxon)
For: Gold Bolt #10
----------------------------------------------------------------------------------------------------------------------------------------------------------------------------------
a) --Bring prize to agent
Once you win the hoverboard race on Planet Rilgar, you will receive the Platinum Zoomerator. Take the teleporter to Skid's Agent to be rewarded with the Sonic Summoner. This will allow you to conjure sand mice to help fight for you. They can be summoned more than once, and they can be found on the Sand Mouse Locations page.
b) After acquiring the Devastator from Planet Batalia, return to shoot down three flying ships for Skill Point #6 (Transported).
c) Come back with the Magneboots from Planet Orxon, and take the teleporter to Skid's Agent. Climb the magnestrip on the brick wall behind him. At the top, there are crates around the circle, and inside the laser building along with Gold Bolt #10.
|
|
Planet Eudora, Logging Site
Objectives:
--Confront robot lieutenant
--Explore the mills
Stuff:
Suck Cannon
Glove of Doom for 7,500 Bolts/5,000 Bolts with the Persuader (Wait To Purchase After Beating Game)
Infobot to Nebula G34
1/1 Gold Bolts
1/1 Skill Points
--Confront robot lieutenant
Kill the ax-bot in front of you, and then break the boxes next to the vendor. Then climb the layers to the cubbyhole above them for two more crates. Exit and wrench the two other ax-bots and get the crates. Next move onto the first set of sawbots and throw the wrench at them. Jump up the next two platforms and look back towards the ship. On the wall, there is a ledge with Gold Bolt #11 sitting on it, so Boost Jump up and Glide to reach it.
--Confront robot lieutenant
--Explore the mills
Stuff:
Suck Cannon
Glove of Doom for 7,500 Bolts/5,000 Bolts with the Persuader (Wait To Purchase After Beating Game)
Infobot to Nebula G34
1/1 Gold Bolts
1/1 Skill Points
--Confront robot lieutenant
Kill the ax-bot in front of you, and then break the boxes next to the vendor. Then climb the layers to the cubbyhole above them for two more crates. Exit and wrench the two other ax-bots and get the crates. Next move onto the first set of sawbots and throw the wrench at them. Jump up the next two platforms and look back towards the ship. On the wall, there is a ledge with Gold Bolt #11 sitting on it, so Boost Jump up and Glide to reach it.

Next, jump back down and head back towards the ship. Go all the way until you reach the door behind your ship. Get the boxes and equip the Trespasser to open the door. The combination is (5c, 4c, 5cc). Go ahead and then glide down to the ledge below. Collect the free bolts and then double jump to the next ledge. Turn the bolt crank, equip the swingshot and swing to the next platform. Turn the second bolt crank and glide to the first moving platform. Stretch jump when your platform is above the target platform. Turn the third bolt crank and swingshot to the door. Equip the Tresspasser and enter the combination (2c, 6c, 1cc). Throw your wrench at the boxes, collect the bolts and move into the next room. The robot lieutenant will drop an infobot to Nebula G34. Bust the remaining crates and move forward to return to the vendor.
--Explore the mills
Use the bolt crank in front of the door you just came from to extend the bridge. Stand on the bridge and use the blaster on ten ships flying by for Skill Point #7 (Any Ten). Cross the bridge and wrench the ammo crate, explosive crate, and sawbots. Then proceed straight ahead to navigate the yellow wall jump. Kill the sawbot and turn the bolt crank for some crates. You may notice a sand mouse between the tree and platform. Jump back down the wall and take a left. Wrench a few sawbots, break the crates, and collect loose bolts. Then throw your wrench at the ax-bot, and then jump up for the bolts. Use the bolt crank to extend a second bridge. There will be crates and loose bolts to the left. After you get those, throw your wrench at the explosive crate on the ledge, and then equip your blaster to kill the enemies up on the ledge. Blast 'em, take the various crates on the edge, and then climb the steps. There will be a bunch of bots and two gunners. Stay close to the steps and let the sawbots come to you. Then rush the gunner ahead with a blaster and get the two sets of crates to either side of him and the loose bolts around the edge. Then go back to take out the ax-bots, second gunner, and remaining crates.
Cross the yellow bridge, get the ammo crate, and jump up to the yellow platform around the tree. Get all of the crates and bolts above and then hop back down to take care of the enemies you passed already. Blast the gunner ahead and get the crates on the ropes to the left. Then move ahead to kill two sawbots and two gunners, and get the three crate stacks and an ammo crate. Go back and navigate the steps on the left, wrenching the ax-bot as you go. At the top, blast the two gunners and ax-bot. Get the ammo crates on the right, turn the bolt crank, and boost jump up to the ledge. Get the nanotech if needed and continue onto the platform. Once it rises, glide down and blast the giant ax-bot. Get the crates to the left and then go kill the sawbots. Smash the crates on the left and wall jump up for some more. Then get down, go through the door, and blast another big bot. Wrench the ammo and the pipes to the left and boxes on the right, and then continue.
Glide down to get the crates below and then jump up the ledge. Blast the gunner ahead, kill the three sawbots, and then move onto the two gunners near the crates on the left. After that is done, stand in the doorway to snipe the three giant ax-bots with the Blaster. Then move into the room to collect the loose bolts, blow up the crates, and wrench the pipes on the right wall. Then walk forward to claim the Suck Cannon. (Note: the Suck Cannon is an excellent weapon because it has no ammo cost, feel free to use this weapon instead of the wrench when applicable). Press on for some loose bolts and nanotech crate, and then Stretch Jump to the next ledge. Suck up the sawbot and jump-fire it across the canyon at the others. Stretch Jump the gap and suck up the next few. Follow the edge, firing the cannon at any left-over enemies. Empty the cannon when your done, fill up on ammo at the vendor, and then get in your ship to head to Nebula G34.

Nebula G34, Blarg Station
Objectives:
--Explore the space station
--Buy Grindboots
--Explore the Blarg warship
--Destroy the warship
--Journey outside the airlock
Stuff:
Taunter for 2,500 Bolts (Recommended)
Grindboots for 2,000 Bolts
Hydrodisplacer
Infobot for Planet Rilgar
1/2 Gold Bolts
1/1 Skill Points
--Explore the space station
Hop down to wrench the light fixtures and three crates below. Then climb back up, get both pairs of boxes, and then go to the vendor. Buy the Taunter, and make sure all your guns have ammo. Head down the ramp towards the electric door, and wrench the yellow orb to deactivate the electric fence. As you make your way through, throw your wrench at the blue lights on the tunnel ceiling, avoid being hit by the green sprayers, and suck cannon any frogs that get in your way. If you have some frogs left in your cannon, use it on the green guy ahead. Equip the Taunter to lure the next green guy into the electric fence. Throw your wrench at the yellow lights above, and then clear the room of crates, lamps, and orbs. Suck cannon the frogs and break the blue lights as you move to a door. Use the Trespasser combination (4c, 2c, 3c), and then throw your wrench at the three boxes in the middle because they contain frogs. Smash the crates and the lamps in the corners.
When your done, move to the adjacent room. If you have enough health to risk it, go for the boxes on the right and come back. Then carefully make your way up the ledges to the crates. Swingshot across, blast the green guy, and throw your wrench at the boxes from a distance. Get the blue lights and then blow up the crates in the next room. Use the Taunter near the electric fence to kill some frogs and equip your Blaster. Wrench one orb and blast the alien, and then do the same for the second. Move through the tunnel getting frogs and blue lights. Kill the green guy ahead, get the crates, and then get your suck cannon the frogs in the big room to fire at the two aliens. Feel free to retreat if you get surrounded because they will leave you alone near the entrance. Wrench the yellow light above and clear the lower cubbyholes of crates. Boost Jump up the left side for some boxes and then make your way to the other side. There are two cubbyholes on the right side, one with a bunch of frogs and a gold bolt. Equip and empty the suck cannon. From the doorway, fill up the suck cannon with frogs and throw the wrench at the rest. This room contains a lot of boxes, a sand mouse, and Gold Bolt #12.
--Explore the space station
--Buy Grindboots
--Explore the Blarg warship
--Destroy the warship
--Journey outside the airlock
Stuff:
Taunter for 2,500 Bolts (Recommended)
Grindboots for 2,000 Bolts
Hydrodisplacer
Infobot for Planet Rilgar
1/2 Gold Bolts
1/1 Skill Points
--Explore the space station
Hop down to wrench the light fixtures and three crates below. Then climb back up, get both pairs of boxes, and then go to the vendor. Buy the Taunter, and make sure all your guns have ammo. Head down the ramp towards the electric door, and wrench the yellow orb to deactivate the electric fence. As you make your way through, throw your wrench at the blue lights on the tunnel ceiling, avoid being hit by the green sprayers, and suck cannon any frogs that get in your way. If you have some frogs left in your cannon, use it on the green guy ahead. Equip the Taunter to lure the next green guy into the electric fence. Throw your wrench at the yellow lights above, and then clear the room of crates, lamps, and orbs. Suck cannon the frogs and break the blue lights as you move to a door. Use the Trespasser combination (4c, 2c, 3c), and then throw your wrench at the three boxes in the middle because they contain frogs. Smash the crates and the lamps in the corners.
When your done, move to the adjacent room. If you have enough health to risk it, go for the boxes on the right and come back. Then carefully make your way up the ledges to the crates. Swingshot across, blast the green guy, and throw your wrench at the boxes from a distance. Get the blue lights and then blow up the crates in the next room. Use the Taunter near the electric fence to kill some frogs and equip your Blaster. Wrench one orb and blast the alien, and then do the same for the second. Move through the tunnel getting frogs and blue lights. Kill the green guy ahead, get the crates, and then get your suck cannon the frogs in the big room to fire at the two aliens. Feel free to retreat if you get surrounded because they will leave you alone near the entrance. Wrench the yellow light above and clear the lower cubbyholes of crates. Boost Jump up the left side for some boxes and then make your way to the other side. There are two cubbyholes on the right side, one with a bunch of frogs and a gold bolt. Equip and empty the suck cannon. From the doorway, fill up the suck cannon with frogs and throw the wrench at the rest. This room contains a lot of boxes, a sand mouse, and Gold Bolt #12.
|

|
Move back into the big room, and use the Taunter to lure the first alien into the fence. Afterward, wrench the orbs and equip the suck cannon. Use the suck cannon missiles on the alien and wrench the frogs. Throw your wrench at the next orb and snipe the next two aliens with the rest of the suck cannon and the Blaster. Continue to wrench the orbs and snipe enemies around the room. After destroying the last orb, save your game. For Skill Point #8 (Girl Trouble), you must defeat the alien Queen and her minions with only your wrench, but you do have a continue point next to the vendor in the big room if you die.
The best way to attack the queen is to double jump around her and Hyper-Stike on the way down. When the frogs come Stretch-Jump away from them and throw your wrench back at them from a distance. Get the nanotech after the frog round if needed. When the two aliens come throw your wrench at one and then Hyper-Strike it. Kill the second as soon as possible, and then your home free. Collect the crates around the edges, and go in the next room to wrench some crates, lights, and frogs.
--Buy Grindboots
They will cost 2,000 Bolts. Then jump on the grindrail to land on a Trespasser pad near the ship.
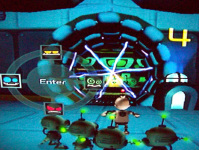
--Journey outside the airlock
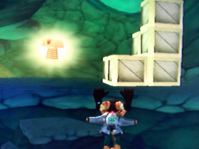
Use the combination (3cc, 1cc, 3c) on the Trespasser lock near the ship. Approach the door and press Triangle to send Clank outside. Run forward to press the red button. Go out the door, climb the ledge, and follow the green path ahead. Jump up at the end and look to the right of the door. You should see a Gold Bolt on the ledge ahead, but you will have to come back later as Ratchet to get it. Finish the climb, punch the frog with the Square Button, and then get the two crates ahead. Climb the crate on the left and get the sets of crates on the ledge. Jump back down, get the crate, and then glide off of the edge onto the blue crates.
Get the five boxes ahead and then proceed to the left. Kill the frogs, and climb the high ledges on the left and glide to the green path with the two crates. Glide back, get the boxes on the left and climb the ladder ahead. Follow the green path slowly, being careful not to fall off. Jump up to grab the yellow ledge and move to the right to get up. Climb the step, and go into the door on the left.
The best way to attack the queen is to double jump around her and Hyper-Stike on the way down. When the frogs come Stretch-Jump away from them and throw your wrench back at them from a distance. Get the nanotech after the frog round if needed. When the two aliens come throw your wrench at one and then Hyper-Strike it. Kill the second as soon as possible, and then your home free. Collect the crates around the edges, and go in the next room to wrench some crates, lights, and frogs.
--Buy Grindboots
They will cost 2,000 Bolts. Then jump on the grindrail to land on a Trespasser pad near the ship.
--Journey outside the airlock
Use the combination (3cc, 1cc, 3c) on the Trespasser lock near the ship. Approach the door and press Triangle to send Clank outside. Run forward to press the red button. Go out the door, climb the ledge, and follow the green path ahead. Jump up at the end and look to the right of the door. You should see a Gold Bolt on the ledge ahead, but you will have to come back later as Ratchet to get it. Finish the climb, punch the frog with the Square Button, and then get the two crates ahead. Climb the crate on the left and get the sets of crates on the ledge. Jump back down, get the crate, and then glide off of the edge onto the blue crates.
Get the five boxes ahead and then proceed to the left. Kill the frogs, and climb the high ledges on the left and glide to the green path with the two crates. Glide back, get the boxes on the left and climb the ladder ahead. Follow the green path slowly, being careful not to fall off. Jump up to grab the yellow ledge and move to the right to get up. Climb the step, and go into the door on the left.
|
|
Follow the loose bolts around the corner and get the two crates. Punch the glass containing the four Gadge-Bots. Go back to the other room, and hold Triangle to command the bots to Attack the alien while you get the large stack of crates on the left. If you find yourself missing a Gadge-Bot because it was killed, you need to go back to where you found it and command it to Follow. When you go into the room with the electric fence, command the bots to Enter, while you get the two boxes on the left. Get the two crates on the left in the next room and then claim the Hydrodisplacer. Cross the bridge that just appeared, turn left at the end, and activate the elevator button. Walk towards the door and press Triangle to Return to Ratchet.
--Explore the Blarg warship
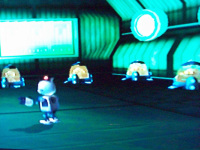
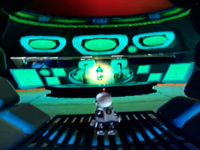
Go to the vendor side of the ship area, and go into the cubbyhole on the right. Jump into the transport and press Triangle. Every room has enemies in it, so use the Blaster and Suck Cannon to clear all of them, being sure to get any boxes around the edges on the way. Make sure to blow up the blue crates near the ramps in the last room.
Go to the vendor side of the ship area, and go into the cubbyhole on the right. Jump into the transport and press Triangle. Every room has enemies in it, so use the Blaster and Suck Cannon to clear all of them, being sure to get any boxes around the edges on the way. Make sure to blow up the blue crates near the ramps in the last room.
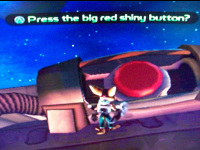
--Destroy the warship
Go press the Big Red Shiny Button near the window. As the warship self-destructs run as quickly as you can back to the transport, blasting any enemies that get in your way. At the end, you will be taken off of the ship and presented with and infobot for Planet Rilgar. Fill up ammo at the vendor, then go to your ship and fly to Blackwater City.
Come Back!
1/1 Gold Bolts
a) With: O2 Mask (Orxon)
For: Gold Bolt #13
----------------------------------------------------------------------------------------------------------------------------------------------------------------------------------
a) Come back with the O2 Mask and then go down where the Trespasser was used to send Clank into space. Go in as Ratchet this time and hit the elevator button. Move along the right path, going backwards in the level. Move through the room until you are outside facing the gold bolt. Simply double jump and glide for Gold Bolt #13.
Planet Rilgar, Blackwater City
Objectives:
--Win the hoverboard race
--Locate Captain Qwark
--Bribe the bodyguard
Stuff:
Platinum Zoomerator
Mine Glove for 7,500 Bolts/5,000 Bolts with the Persuader (Wait To Purchase After Beating Game)
Infobot for Planet Umbris
1/2 Gold Bolts
2/3 Skill Points
--Win the hoverboard race
Go to the path on the right, near the vendor. Jump on the water platform and then on the ledge. Hit the red button, kill the yellow guy, and snipe the tank with your Blaster. Collect the ammo crates that were near the button, and then throw your wrench at the explosive crates on the right and left inside. Continue out the next door, blast the explosive crate, and then make your way across the water. Hit the button and Blast all of the yellow guys. Go in, Pyrocitor the Ameboid and the smaller ones that follow. Get the two sets of boxes on the right and the one on the left. Go up the stairs ahead and hit the red button. Snipe the yellow guys while they are crossing the bridge. Get the boxes, go into the elevator and press the button. Move out the door, Pyro the ameboid, press the red button, and pyro the rest. Collect the two crates outside and the two crates inside, and then ride the taxi to head downtown.
Get the boxes and blue streetlights behind the taxi, and then go kill all of the enemies. Then smash all of the crates around the edges, and blue street lights. Ride the sewer caps to get the crates on the surrounding ledges above. Talk to the R.Y.N.O. salesman, and then hit the button near the door where the tank was. Kill both yellow guys and press the button on the elevator. Go forward, get all of the boxes except the ammo crates around the top, and take note of the sand mouse up there. Jump down and pyro the ameboids, then press the red button to kill a bunch of yellow guys. Collect the boxes around the wall and then climb back up for the ammo crates. Jump back down, go into the tunnel close to the ladder, and activate the elevator. Equip the Pyrocitor and deactivate all of the laser fences possible, killing the enemies and getting the crates as you go. You may notice the gold bolt in the last column has a broken red button in front of it. Come out of the column, get the two crates ahead, and go to the right towards the sewer cap. Get on it and jump onto the laser fences. Double jump and glide your forward using the circular pads for Gold Bolt #14. Get the boxes, hit the red button and go back to the sewer cap.
--Win the hoverboard race
--Locate Captain Qwark
--Bribe the bodyguard
Stuff:
Platinum Zoomerator
Mine Glove for 7,500 Bolts/5,000 Bolts with the Persuader (Wait To Purchase After Beating Game)
Infobot for Planet Umbris
1/2 Gold Bolts
2/3 Skill Points
--Win the hoverboard race
Go to the path on the right, near the vendor. Jump on the water platform and then on the ledge. Hit the red button, kill the yellow guy, and snipe the tank with your Blaster. Collect the ammo crates that were near the button, and then throw your wrench at the explosive crates on the right and left inside. Continue out the next door, blast the explosive crate, and then make your way across the water. Hit the button and Blast all of the yellow guys. Go in, Pyrocitor the Ameboid and the smaller ones that follow. Get the two sets of boxes on the right and the one on the left. Go up the stairs ahead and hit the red button. Snipe the yellow guys while they are crossing the bridge. Get the boxes, go into the elevator and press the button. Move out the door, Pyro the ameboid, press the red button, and pyro the rest. Collect the two crates outside and the two crates inside, and then ride the taxi to head downtown.
Get the boxes and blue streetlights behind the taxi, and then go kill all of the enemies. Then smash all of the crates around the edges, and blue street lights. Ride the sewer caps to get the crates on the surrounding ledges above. Talk to the R.Y.N.O. salesman, and then hit the button near the door where the tank was. Kill both yellow guys and press the button on the elevator. Go forward, get all of the boxes except the ammo crates around the top, and take note of the sand mouse up there. Jump down and pyro the ameboids, then press the red button to kill a bunch of yellow guys. Collect the boxes around the wall and then climb back up for the ammo crates. Jump back down, go into the tunnel close to the ladder, and activate the elevator. Equip the Pyrocitor and deactivate all of the laser fences possible, killing the enemies and getting the crates as you go. You may notice the gold bolt in the last column has a broken red button in front of it. Come out of the column, get the two crates ahead, and go to the right towards the sewer cap. Get on it and jump onto the laser fences. Double jump and glide your forward using the circular pads for Gold Bolt #14. Get the boxes, hit the red button and go back to the sewer cap.
|
|
This time, snipe the tank with the Blaster and then jump to the ledge. Snipe the second tank, get the crates ahead, and move down the hall to activate the elevator. Go around the edges to get all of the crates, hit the red button, and pyro the enemies. Go back to the middle, throw your wrench at the blue streetlights, and talk to the lady.
Race 3 laps against the coms, using the green arrows and blue rings as boosters.
After you win, you will get the Platinum Zoomerator.
Re-race to get two skill points. They can be difficult, so feel free to give up and come back later.
When you're done, take the taxi back to the ship.
Race 3 laps against the coms, using the green arrows and blue rings as boosters.
After you win, you will get the Platinum Zoomerator.
Re-race to get two skill points. They can be difficult, so feel free to give up and come back later.
When you're done, take the taxi back to the ship.
|
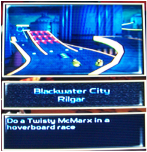
Skill Point #9 (Tricky)
Perform a Twisty McMarx in the hoverboard race. To do this, press each shoulder button once in a direction while going off the large ramp. |
|
|
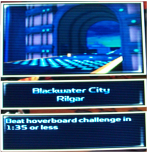
Skill Point #11 (Speedy)
Beat the hoverboard race in 1:35 or less. Avoid the last three ramps, never miss a boost, and cut curves as much as possible. This one is the hardest to do. |
|
--Locate Captain Qwark
Stretch jump from the taxi stop to the water platform with the loose bolts, and then swingshot across. Get the crate and loose bolt, and then swingshot to the doorway. Press the button in the elevator, equip the Hydrodisplacer, and press Circle while on the pad to remove the water. Go boost jump up the ledges on the left. Ignore the bolts in the next pool, and fill up the pool. Swim to the tunnel and wrench the barriers. Empty the next pool, go wrench the barrier in the tunnel, and come back to fill the pool back up again. Press Square to dive, swim through the tunnel, press X to rise, and climb the ledge. Get all of the boxes and then jump into the rocky tunnel. At the bottom there is a button that will flood the tunnel. Equip a weapon to take out any enemies that will get in your way (try to avoid them), and prepare to stretch jump as much as possible to outrun the water. Dive at the end and swim up to a ladder. Climb it, cross the platforms and do one final swim. Press the button in the elevator. Get the boxes, button, and any enemies. Talk to the bodyguard.
Stretch jump from the taxi stop to the water platform with the loose bolts, and then swingshot across. Get the crate and loose bolt, and then swingshot to the doorway. Press the button in the elevator, equip the Hydrodisplacer, and press Circle while on the pad to remove the water. Go boost jump up the ledges on the left. Ignore the bolts in the next pool, and fill up the pool. Swim to the tunnel and wrench the barriers. Empty the next pool, go wrench the barrier in the tunnel, and come back to fill the pool back up again. Press Square to dive, swim through the tunnel, press X to rise, and climb the ledge. Get all of the boxes and then jump into the rocky tunnel. At the bottom there is a button that will flood the tunnel. Equip a weapon to take out any enemies that will get in your way (try to avoid them), and prepare to stretch jump as much as possible to outrun the water. Dive at the end and swim up to a ladder. Climb it, cross the platforms and do one final swim. Press the button in the elevator. Get the boxes, button, and any enemies. Talk to the bodyguard.
--Bribe the bodyguard
It will cost 4,000 bolts. Qwark will give Ratchet an infobot for Planet Umbris. Ride the taxi back to the ship, and fly to Planet Umbris.
Come Back!
1/2 Gold Bolts
1/3 Skill Points
a) With: Morpharay (Oltanis)
For: Skill Point #10 (Cluck, Cluck)
b) With: O2 Mask (Pokitaru) -- Mapomatic and/or Hydro-Pack are helpful but not required
For: Gold Bolt #15
----------------------------------------------------------------------------------------------------------------------------------------------------------------------------------
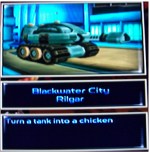
a) Bring the Morpharay from Planet Oltanis along as you go down the path to the hoverboard races. Find a tank, get close to it fast, and move with it to turn it into a chicken for Skill Point #10 (Cluck, Cluck).
It will cost 4,000 bolts. Qwark will give Ratchet an infobot for Planet Umbris. Ride the taxi back to the ship, and fly to Planet Umbris.
Come Back!
1/2 Gold Bolts
1/3 Skill Points
a) With: Morpharay (Oltanis)
For: Skill Point #10 (Cluck, Cluck)
b) With: O2 Mask (Pokitaru) -- Mapomatic and/or Hydro-Pack are helpful but not required
For: Gold Bolt #15
----------------------------------------------------------------------------------------------------------------------------------------------------------------------------------
a) Bring the Morpharay from Planet Oltanis along as you go down the path to the hoverboard races. Find a tank, get close to it fast, and move with it to turn it into a chicken for Skill Point #10 (Cluck, Cluck).
b) Come back with the O2 Mask from Planet Pokitaru. Re-do the water level path until you come to the rockslide. Swim down it, go through the door on the left, and stop before the curving ramp after the jump pads. Dive to the bottom to find a tunnel on the right. Rise up the end of the tunnel for some boxes and Gold Bolt #15.
|
|
Planet Umbris, Qwark's HQ
Objectives:
--Survive Qwark's gauntlet
--Destroy the Snagglebeast
--Find a new ship
Stuff:
Infobot for Planet Batalia
New Ship
2/2 Gold Bolts
--Survive Qwark's gauntlet
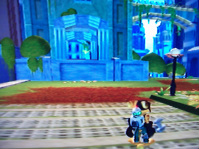
Get the boxes around the ship and fill up ammo at the vendor. Then swingshot and glide across the muck ocean to the ground below. Then throw your wrench at the crates on the left, and then fire three Blaster shots at the thing throwing the bombs. Go about halfway onto the bridge and snipe the bomber and then move on to get the mines. Get the boxes on the edge and go on. Dodge the turret's fire, get the crates, and continue. Snipe the mines and get the crates around the corner. Cross the bridge, blast the bombers, and throw your wrench and the crates on the left. Double jump up the steps ahead, blasting the mines in mid-air. Break the crates, and snipe the mines on the next bridge. Cross the bridge, get the crates, and then step on each of the three green buttons on the ground. Get the boxes on the left, snipe the bombers, collect the bolts, and step on the next set of buttons. Once the door opens, stretch jump to the middle of the bridge (the black portion), and then one more time to get across. After wrenching the crates, double jump your way across the next bridge, being careful of the rusty platforms that will fall down. Get the crates on the left side, and wrench the mask on the wall. Then dodge the turret on your way to the explosive crates and throw your wrench at them. Follow the path to the next two sets of boxes and get them too. Walk around or wrench the turret, equip the swingshot, and make your way to the bridge ahead. Take a right, and then double jump onto the platform on the right of the building. Follow the path, stepping on the green buttons as you go. Get the boxes at the end and go back to the front of the building. Inside you will find Gold Bolt #16 and a lot of crates.
--Survive Qwark's gauntlet
--Destroy the Snagglebeast
--Find a new ship
Stuff:
Infobot for Planet Batalia
New Ship
2/2 Gold Bolts
--Survive Qwark's gauntlet
Get the boxes around the ship and fill up ammo at the vendor. Then swingshot and glide across the muck ocean to the ground below. Then throw your wrench at the crates on the left, and then fire three Blaster shots at the thing throwing the bombs. Go about halfway onto the bridge and snipe the bomber and then move on to get the mines. Get the boxes on the edge and go on. Dodge the turret's fire, get the crates, and continue. Snipe the mines and get the crates around the corner. Cross the bridge, blast the bombers, and throw your wrench and the crates on the left. Double jump up the steps ahead, blasting the mines in mid-air. Break the crates, and snipe the mines on the next bridge. Cross the bridge, get the crates, and then step on each of the three green buttons on the ground. Get the boxes on the left, snipe the bombers, collect the bolts, and step on the next set of buttons. Once the door opens, stretch jump to the middle of the bridge (the black portion), and then one more time to get across. After wrenching the crates, double jump your way across the next bridge, being careful of the rusty platforms that will fall down. Get the crates on the left side, and wrench the mask on the wall. Then dodge the turret on your way to the explosive crates and throw your wrench at them. Follow the path to the next two sets of boxes and get them too. Walk around or wrench the turret, equip the swingshot, and make your way to the bridge ahead. Take a right, and then double jump onto the platform on the right of the building. Follow the path, stepping on the green buttons as you go. Get the boxes at the end and go back to the front of the building. Inside you will find Gold Bolt #16 and a lot of crates.
Exit the room, and take a left once you cross the bridge. Do a full circle along the left wall, getting boxes, masks, and mines. Once you have returned, wrench the two turrets in the middle, and then the boxes near the first green button. Wrench the turret covering the second green button and run around to the right to complete a second circle, passing the third green button. Now repeat the second circle, but this time step on all three buttons. A door near the bridge will open, so get the crates on the right and climb the steps. Snipe the two sets on mines ahead, get the two sets of boxes, and step on the three green buttons. When the door opens, smash the crates in the back-left corner and then climb the ladder.
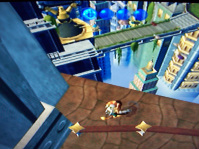
Stretch jump to the crates on the left, get them and come back again. Drain the pool, and wrench the fish in the bottom. Move through the tunnel and kill the two fish in the next pool. Climb the steps, go get the crates, and then take care of the fish and purple shells in the third pool. Go back up the ladder, and then to the railing. Follow it back to the steps until you can look over the edge and see a gold bolt below. Jump over the railing and glide down to Gold Bolt #17.
Stretch jump to the crates on the left, get them and come back again. Drain the pool, and wrench the fish in the bottom. Move through the tunnel and kill the two fish in the next pool. Climb the steps, go get the crates, and then take care of the fish and purple shells in the third pool. Go back up the ladder, and then to the railing. Follow it back to the steps until you can look over the edge and see a gold bolt below. Jump over the railing and glide down to Gold Bolt #17.
Press the three green buttons to get back out and return to the third pool to fill it up. Cross the water, and get the three sets of crates laying around. Then remove the water, kill the fish, smash the purple shells, and then fill it back up again. Swim over to get the fourth set of crates ahead. Then dive underwater and swim up to the next room. Wrench the crates, lower the water level, and swingshot across. Break the boxes, and kill all of the fish in the next room. Climb back up, fill the pool, and go press the three green buttons in the middle. Swim back, drain the pool, and then boost jump up to the doorway that just opened. Get the crates in the tunnel, and on the left and right at the end of it. Then cross the bridge to talk to Captain Qwark.
--Destroy the Snagglebeast
Watch out for its attacks and shoot it with the Blaster until it puts up a shield. Make it follow you over a bridge, and it will fall into the lava, take damage, and lose its shield. Repeat this twice, using the crates laying around for health and ammo. It may take your ammo and throw it around everywhere, so you will just have to go collect it. Finish collecting ammo and crates when it is dead. Then go toward the door where a new ship and an infobot to Planet Batalia are waiting. Then travel to Planet Batalia.
Planet Batalia, Fort Krontos
Objectives:
--Scout the area
--Ride the grind rail
--Buy Deserter's Infobot
--Talk to the Commando
--Meet the Commando at city
Stuff:
Devastator for 10,000 Bolts (Recommended)
Infobot for Planet Gaspar for 2,000 Bolts
Infobot for Planet Orxon
2/2 Gold Bolts
1/3 Skill Points
--Talk to the Commando
Upon arriving you will talk to the Commando. He will tell you to meet him at the walled city to take out the bombers.
--Scout the area
After talking to the Commando, go to the vendor. Fill up your ammo. Then buy the Devastator, but not any ammo. Now wrench the crates near the vendor, and then suck cannon the laserbots. Pull out the Devastator and shoot the robot near the left building. Then shoot the suck cannon at the yellow gunners. Collect the bolts, go forward until the bridge blows up, and then go back to that left building. Wall jump by the Trespasser pad to the roof for Gold Bolt #18. Then jump down and unlock the door with the Trespasser combination (4c, 5cc, 2c). Have a hay day with the crates, and then get the crates and enemies around and on top of the right building. A sand mouse is located in the back.
--Scout the area
--Ride the grind rail
--Buy Deserter's Infobot
--Talk to the Commando
--Meet the Commando at city
Stuff:
Devastator for 10,000 Bolts (Recommended)
Infobot for Planet Gaspar for 2,000 Bolts
Infobot for Planet Orxon
2/2 Gold Bolts
1/3 Skill Points
--Talk to the Commando
Upon arriving you will talk to the Commando. He will tell you to meet him at the walled city to take out the bombers.
--Scout the area
After talking to the Commando, go to the vendor. Fill up your ammo. Then buy the Devastator, but not any ammo. Now wrench the crates near the vendor, and then suck cannon the laserbots. Pull out the Devastator and shoot the robot near the left building. Then shoot the suck cannon at the yellow gunners. Collect the bolts, go forward until the bridge blows up, and then go back to that left building. Wall jump by the Trespasser pad to the roof for Gold Bolt #18. Then jump down and unlock the door with the Trespasser combination (4c, 5cc, 2c). Have a hay day with the crates, and then get the crates and enemies around and on top of the right building. A sand mouse is located in the back.
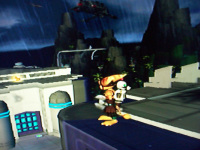
|
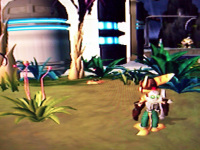
|
--Ride the grind rail
Now go back near the vendor, and go up the ramp, stopping to get the crates on each side (the second cubby on the left has hidden explosive crates). Ride the grind rail to the Deserter. Avoid losing any nanotech on the grind rail for Skill Point #12 (Jumper).
Now go back near the vendor, and go up the ramp, stopping to get the crates on each side (the second cubby on the left has hidden explosive crates). Ride the grind rail to the Deserter. Avoid losing any nanotech on the grind rail for Skill Point #12 (Jumper).
--Buy Deserter's Infobot
It will cost 2,000 Bolts, then teleport back to the ship area. Go down the ramp and take a right.
--Meet the Commando at city
Kill any enemies and cross the bridge that was blown up. Suck cannon the laser-bots and fire them at the yellow guy ahead and the gunner in the grass. Get the mess of crates on the right, and then continue down the ramp. Use the Blaster and suck cannon on the enemies below, and then go get the crates past the bolt crank. Come back and turn the crank to extend the bridge. Hurry to the top again and blast the tank's gun as it crosses the bridge. Finish it off, cross the bridge, and climb up the ledges on the right. Stretch jump to the next platform, and continue for some boxes and Gold Bolt #19.
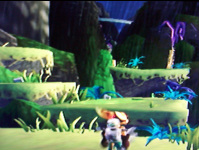
|
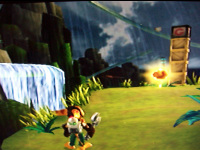
|
Make your way back to the bridge, get the crates in the cubbyhole, and climb over the ledge into the water. Blast the two yellow guys, and get the two sets of crates nearby. Then go kill the tank and gunners below. Turn the two bolt cranks, climb the steps, and cross the bridge to the Commando. He will give you an infobot for Planet Orxon. Get the box and take the taxi to the ship for Planet Gaspar.
Come Back!
Objectives:
--Explore the walled city
--Destroy the bombers
2/3 Skill Points
a) With Magneboots (Orxon) and Sonic Summoner (Aridia)
For: Skill Point #14 (Eat Lead)
b) With: Magneboots (Orxon)
For: Skill Point #13 (Accuracy Counts) and Metal Detector
----------------------------------------------------------------------------------------------------------------------------------------------------------------------------------
a) --Explore the walled city
Make sure you brought the hoverboard prize to Skid's Agent in Aridia to receive the Sonic Summoner. Replay the journey to the walled city, but this time let the sand mouse kill both tanks. If it disappears, go back for another one. Once you reach the walled city, walk onto the magnestrip and follow it, throwing your wrench at the laser-bots as you go. When you arrive, use the Devastator on three targets ahead -- the yellow guy, the laser-bot producer, and the little brown robot to the left of the crates. Go forward to suck cannon the laser-bots, collect the bolts, and run up the ramp on the right. Turn the bolt crank, go get the boxes with the nanotech on top, and hop back down. Hop up the ledge, throw your wrench at the red crate, and let your sand mouse kill the two tanks for Skill Point #14 (Eat Lead). If it disappears, take the taxi back to get another. Afterwards, wrench the robots, and boost jump off of the crates in the SE corner to the upper ledge and smash the boxes when your done getting the crates up top. Then boost jump up the NW corner, get the two crates, stretch jump the gap on the left for another one, and finish by getting the four on the ground. Turn the bolt crank and cross the bridge to talk to the Plumber.
|
|
b) --Destroy the bombers
Get the mess of boxes to the right and then enter the turret. Ignore the large ships and shoot one of the smaller jets in the background for Skill Point #13 (Accuracy Counts). The map will show incoming missiles as red dots, so be sure to shoot them as well so you don't die. Once that is done, re-enter the turret to shoot down the bombers by knocking off their missiles. The Plumber will give you the Metal Detector as a reward. Go around to pull all of the bolts out of the ground and take the taxi back to the ship.
Get the mess of boxes to the right and then enter the turret. Ignore the large ships and shoot one of the smaller jets in the background for Skill Point #13 (Accuracy Counts). The map will show incoming missiles as red dots, so be sure to shoot them as well so you don't die. Once that is done, re-enter the turret to shoot down the bombers by knocking off their missiles. The Plumber will give you the Metal Detector as a reward. Go around to pull all of the bolts out of the ground and take the taxi back to the ship.
Planet Gaspar, Blarg Depot
Objectives:
--Find the Pilot's Helmet
Stuff:
Walloper for 7,500 Bolts/5,000 Bolts with the Persuader (Wait To Purchase After Beating Game)
Pilot's Helmet
2/2 Gold Bolts
2/2 Skill Points
--Find the Pilot's Helmet
Get the crates with the ammo on top in the ship area. Then wrench the seconds set, and look off of the edge at a platform below next to two tall trees. Glide down to the platform, and wrench the blue lights and the crates. Jump off of the lava platform and swingshot across. Get the boxes in the center, and destroy the anchors to both bombers with the Devastator.
--Find the Pilot's Helmet
Stuff:
Walloper for 7,500 Bolts/5,000 Bolts with the Persuader (Wait To Purchase After Beating Game)
Pilot's Helmet
2/2 Gold Bolts
2/2 Skill Points
--Find the Pilot's Helmet
Get the crates with the ammo on top in the ship area. Then wrench the seconds set, and look off of the edge at a platform below next to two tall trees. Glide down to the platform, and wrench the blue lights and the crates. Jump off of the lava platform and swingshot across. Get the boxes in the center, and destroy the anchors to both bombers with the Devastator.
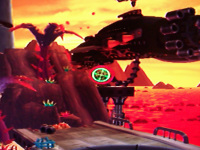
Get the ammo crate, blue lights, and small grey robots. Swingshot to the lava platforms ahead and jump your way to the second island. Go around to kill the robots, and smash the crates and blue lights. Boost jump up to the far side platform and swingshot to the third island. Kill the robots, get the crates and lights, and then climb the ledges on the right. You will find one more robot and two more bomber anchors to destroy. Once the second ship is blown up, swingshot to the fourth island. Wrench the robots and get the boxes tucked on the ledge around to the right. From the ledge, use the Devastator to destroy the next bomber's anchor, and then get on the blue elevator ahead. Wrench the lights and anchor, and check the right ledge for boxes or bolts. Swingshot and hop to the fifth island, and then go around to wrench the anchors and blue lights for Skill Point #15 (Destroyed). Then jump across the new platforms to get Gold Bolt #20 and some lights. Take the taxi back to the beginning.
|
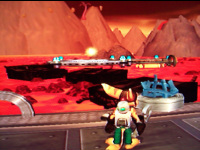
|
Kill all of the robots and yellow rocket guy. Get the crates and the lights, then travel up the hill for bolt and ammo crates. Come back down and get in the turret. Look towards the hill and shoot down 5 ships with the turret for Skill Point #16 (Gunner). Then shift your attention to blowing up the circular doorway with it.
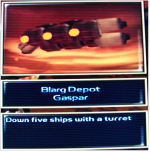
As you go through the door, Bomb Glove the ball shaped robots, get the boxes, and repeat as you go forward. Hyper-Strike the robot balls twice if they are alone. At the end, use the turret to blast the blue boxes and the door. Stretch jump and glide down to collect the bolts, go through the door, and ride the elevator up. Wrench the little robots and bomb glove the pack of balls ahead. Get the nanotech if you need it, and take the door into the tank room. Stand out of the line of fire as you get the crates ahead, and then bomb the yellow guys one by one as you move up. Then retreat and use the Devastator on the last two. Snipe all of the enemies in the next room with the Devastator from the doorway. Then go in and use the turret to shoot the TV screens, crates, and door. Collect all of the bolts around the room. Exit to get boxes, a yellow guy, and robot balls. Get all of the crates and lights, and claim the Pilot's Helmet.
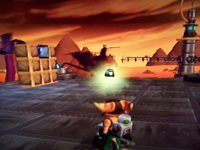
|
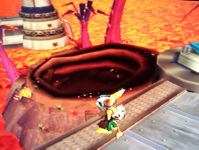
|
If you need any ammo at all, go to the vendor to fill up and then come back. Look off of the edge for a volcano and glide into the opening in the top. Shoot a rocket at the yellow guy, and then wrench the robots. Get the ammo crates and continue. Snipe the yellow guys in the next room, down the hall, and in the last room with the Devastator. Then go forward to the elevator. At the top there will be plenty of ammo to refill your Devastator and Gold Bolt #21. Jump down to the ship and go to Planet Orxon.
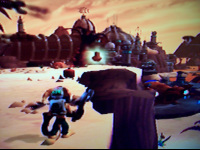
Planet Orxon, Kogar Refinery
Objectives:
--Search the laboratories
--Traverse the wilderness
Stuff:
Magneboots
Infobot for Planet Pokitaru
--Search the laboratories
Clank is on his own until you retrieve the O2 Mask from Pokitaru. First take Clank around the ship area to break all of the crates, and then go in the tunnel for some more. Go straight, get the boxes, kill the frogs, and release the 3 Gadge-Bots. Tell them to enter the teleporters, and then follow you back the way you came. Command them to attack the crab in the right-hand door. Punch the frog, tell them to enter, get the box, and go through the door. Punch the crates and two frogs, and then climb the first ledge ahead to get the tower of boxes. Follow the green path forward and punch the box and two Gadge-Bots. Tell them to attack the crab you passed. Then go into the next room, punch the frogs, free the 4 Gadge-Bots, and get the crates around the edges. Command them to enter the portal, and then again for the door.
Free 2 more bots, tell them to wait by the door, and go around, getting the boxes on the way. Free another bot next to the boxes. Stand on the button to open the previous door, and command the bots to follow. Tell them to wait on the second button, go through the door to stand on the next button, and command them to follow again. Break all of the crates -- especially the blue ones -- and go forward to free another bot. Kill the frog ahead, get the boxes in the corners, and tell the bots to enter the teleporter. Have the bots wait by the door while you get the crates and go around again. Make sure to blow up the red crates first so that your bots will survive the trip to the next teleporter. Get the crates and last Gadge-Bot in the room, and then open the door for your followers. Tell them to enter, step into the teleporter, and tell them once more. Get the crates on the left and around the next room. Then walk forward to get the Magneboots and boxes.
--Search the laboratories
--Traverse the wilderness
Stuff:
Magneboots
Infobot for Planet Pokitaru
--Search the laboratories
Clank is on his own until you retrieve the O2 Mask from Pokitaru. First take Clank around the ship area to break all of the crates, and then go in the tunnel for some more. Go straight, get the boxes, kill the frogs, and release the 3 Gadge-Bots. Tell them to enter the teleporters, and then follow you back the way you came. Command them to attack the crab in the right-hand door. Punch the frog, tell them to enter, get the box, and go through the door. Punch the crates and two frogs, and then climb the first ledge ahead to get the tower of boxes. Follow the green path forward and punch the box and two Gadge-Bots. Tell them to attack the crab you passed. Then go into the next room, punch the frogs, free the 4 Gadge-Bots, and get the crates around the edges. Command them to enter the portal, and then again for the door.
Free 2 more bots, tell them to wait by the door, and go around, getting the boxes on the way. Free another bot next to the boxes. Stand on the button to open the previous door, and command the bots to follow. Tell them to wait on the second button, go through the door to stand on the next button, and command them to follow again. Break all of the crates -- especially the blue ones -- and go forward to free another bot. Kill the frog ahead, get the boxes in the corners, and tell the bots to enter the teleporter. Have the bots wait by the door while you get the crates and go around again. Make sure to blow up the red crates first so that your bots will survive the trip to the next teleporter. Get the crates and last Gadge-Bot in the room, and then open the door for your followers. Tell them to enter, step into the teleporter, and tell them once more. Get the crates on the left and around the next room. Then walk forward to get the Magneboots and boxes.
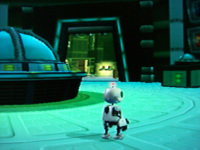
--Traverse the wilderness
Walk into the grass to free the first Gadge-Bot, and head forward towards the bombyard to get the crates. Stay close to the right wall and go around to get all of the crates and Gadge-Bots -- should total 6. As you complete the circle, you will see a doorway to a mazeroom. Go in, tell the bots to wait, and then go get all of the boxes in the room. Come back and lead them up the four ramps to the next door, avoiding the lasers. Walk at a moderate pace dead center on the path. Command the bots to enter at the end, collect the crates, and go through the door.
Next, free the first two bots and kill the two frogs on the right. Command them to attack the crab on the left, and then the three frogs after. Free 3 more bots, get the crates, and move on to attack the rest of the enemies, picking up more bots on the way. Go back if any die, command them to enter and get the crates at the end. Go through the door, blow up the stack of crates on the left, and pick up all of the loose bolts on the ground. Then walk over to the infobot to Planet Pokitaru. Walk off of the ledge and take the elevator back to the ship. Go back to Aridia to get the Sonic Summoner from Skid's Agent, and then go back to Planet Batalia to finish those missions. Afterwards, fly to Planet Pokitaru.
Come Back!
With: O2 Mask (Pokitaru) and Visbomb Gun (Pokitaru)
Objectives:
--Explore as Ratchet
--Catch the Infobot
--Buy Premium Nanotech
Stuff:
Infobot to Planet Hoven
Premium Nanotech for 4,000 Bolts
Ultra Nanotech for 30,000 Bolts
2/2 Gold Bolts
2/2 Skill Points
--Explore as Ratchet
First, break the boxes around the ship and double jump to get the boxes on the platform. Glide down, blast the crab, get the crates, and wrench the orb. Snipe the birds, power slam the boxes, and then snipe the blue screamer before crossing. Blast the sleeping crabs one at a time, break the crates around the edges, and wrench the orbs. You will come to a fork in the road, this time take the right path. Blast the crab on the right, get the ammo crate, and fill your Blaster at the vendor. Walk to the edge and snipe the two screamers and three crabs. Hop down, get the boxes, and snipe the second set of enemies. Go back to the vendor to fill up Blaster ammo, come back, and stretch jump across the ledge. Get the red crate and loose bolts, and then walk toward the infobot and onto the magnestrip.
--Catch the Infobot
Avoid the flames and wrench any birds that come near you. At the end, get the crates on top, and then hop down to get some more. Stand next to the fence and use the Taunter to kill all four crabs with it for Skill Point #18 (Hey, Over Here!).

|
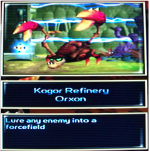
|
Afterwards, climb back up and swingshot over the fence. Collect the bolts and crates, and then swingshot across. Wrench the birds and snipe the crabs as you make your way to the infobot again. When it runs, hop over and climb the steps, getting the orb and the boxes. At the top, blast the screamer and then the four crabs. Remember the tooth-like doorway on the left because you will be coming back here to retrieve a gold bolt. Get the orbs and boxes, and then blast the crabs ahead.
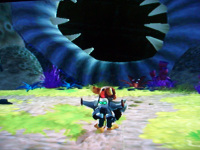
Retreat once the ship starts shooting at you, and then pull out the Visbomb Gun to take it out. Walk forward, get the boxes, and then Pyrocitor all of the crabs ahead. Break the boxes and two green lights at the end, and then walk towards the infobot. It will move up, so just climb the wall with the magneboots to claim the infobot to Planet Hoven.
Jump down, get the boxes, and head out to the yard. Kill the frogs, get the boxes, and head towards the walkway area. Enter the bombyard up to the point of the crates on the left. Fire visbombs at the door behind the gold bolt, and then fire a few more to take out the rest of the doors in the tunnel.
Jump down, get the boxes, and head out to the yard. Kill the frogs, get the boxes, and head towards the walkway area. Enter the bombyard up to the point of the crates on the left. Fire visbombs at the door behind the gold bolt, and then fire a few more to take out the rest of the doors in the tunnel.
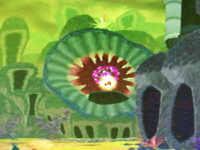
Go back to the ship area, and repeat the infobot path up to the point with the tooth-like door. Now you will be able to enter, and follow the tunnel for some boxes and Gold Bolt #23.

|
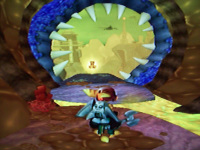
|
Jump down and cross the bombyard to get back to the walkway. Go into the room where the magneboots were found. Play Clank's level in reverse until you reach a green path. Wall jump in the cubby on the right side to find Gold Bolt #22. Then go back the way you came to the ship area.
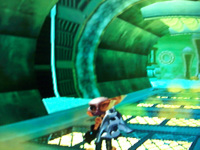
|
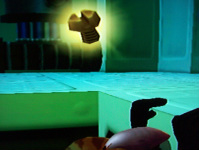
|
--Buy Premium Nanotech
Get back to the vendor at the fork in the road, take the left path, and retreat when the ship appears. Fire a visbomb at it from near the vendor, and then continue up the path, getting the crates. Equip the Blaster, and quickly kill the green guy ahead. Hop the ledge to the next room, get the crates, and throw your wrench at the green lights. By now you should have noticed that there are two doors. Climb the one with the ledge for some boxes and two crabs, then come back. Snipe the green guy in the next room, and then go in to wrench some crates and an orb. Blast the enemies ahead, and get the boxes and two green lights on the door. Jump to the first platform and then back again. Visbomb the ship, hop to the boxes on the right ledge, and continue. Blast the two crabs in the next area, get the boxes, and find the blue pipe on the right wall. Use the Blaster to snipe the blue screamer for Skill Point #17 (Sniper).
Get back to the vendor at the fork in the road, take the left path, and retreat when the ship appears. Fire a visbomb at it from near the vendor, and then continue up the path, getting the crates. Equip the Blaster, and quickly kill the green guy ahead. Hop the ledge to the next room, get the crates, and throw your wrench at the green lights. By now you should have noticed that there are two doors. Climb the one with the ledge for some boxes and two crabs, then come back. Snipe the green guy in the next room, and then go in to wrench some crates and an orb. Blast the enemies ahead, and get the boxes and two green lights on the door. Jump to the first platform and then back again. Visbomb the ship, hop to the boxes on the right ledge, and continue. Blast the two crabs in the next area, get the boxes, and find the blue pipe on the right wall. Use the Blaster to snipe the blue screamer for Skill Point #17 (Sniper).
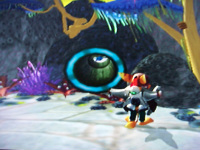
|
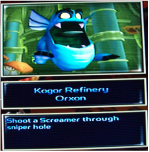
|
Pull out the metal detector for some bolts, and then jump to the second platform. Snipe the lot of crabs with the Blaster, bust the boxes, and then pull out the metal detector again. Hit the orbs, and then throw your wrench at the explosive crates ahead. Snipe the crabs with the Blaster, and then hop across. Break the boxes, and jump across the platforms. Wrench the green guy ahead, and go forward to wrench another. Hop to the next ledge, wrench the crates and two green lights, and then ride the elevator up. Purchase the Premium Nanotech for 4,000 Bolts, and come back to buy the Ultra Nanotech after you get the Tesla Claw. Jump down to get the frogs and boxes. Then, as you are leaving, take the door on the right of the green path. Climb the ledges, and then double jump and glide around the corner to the ledges with crates on top. Go on the the next room to get two frogs and some more boxes. Then go back to the ship and fly to Planet Hoven.
Planet Pokitaru, Jowai Resort
Objectives:
--Check out the resort
--Help the resort owner
--Buy Thrusterpack from Bob
--Destroy the Blarg ships
--Navigate the sewers
Stuff:
Visbomb Gun for 15,000 Bolts/10,000 Bolts with the Persuader (Recommended)
Decoy Glove for 7,500 Bolts/5,000 with the Persuader (Wait To Purchase After Beating Game)
Thrusterpack for 2,000 Bolts
O2 Mask
1/1 Gold Bolts
2/2 Skill Points
--Help the resort owner
First thing, go buy the Visbomb Gun at the vendor, but don't buy any ammo for it. Get the boxes near the ship area and save your game. Shoot down three alien fighters in the air with the Visbomb Gun for Skill Point #19 (Alien Invasion). If you run out of ammo in the Visbomb Gun, re-load the game and try again -- do not buy more ammo. You can press Circle to detonate near them, or go for direct impact. Go down to talk to the resort owner, and then jump in the water. Swim around and blow up all of the red crates on the ocean floor for Skill Point #20 (Buried Treasure).
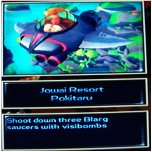
|
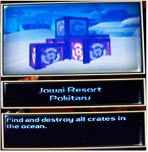
|
Return to the ship area, and then go down the path where the resort owner was to begin leading him to the jet-fighter. Use the Suck Cannon as much as possible on the fish and pink aliens. If you ever need to, the Pyrocitor works on the fish, and the Blaster on the aliens. I recommend the Pyrocitor when riding the taxi, just stay close to the front and shoot back at the fish jumping on. At the end, jump off the taxi and get the boxes on the two islands. Put on the Sonic Summoner Helmet and call the sand mouse from the one near the waterfall. Get back on the taxi and move on quickly, letting the sand mouse get most of the kills, and suck cannoning the rest. Go back for the crates once you reach the next taxi, and then use the Metal Detector to pull up some bolts out of the ground. Re-supply your sand mouse before getting on the taxi, and it will protect you well for the ride. Wrench the crates on the ledge once you arrive, cross the zig-zag bridge, and get some more boxes. Pull out the suck cannon and use it on the fish ahead. Blow up the red boxes, step on the red button, and cross the figure-eight bridge. Suck cannon the rest of the fish ahead to make it to the finish line. Go back for the crates you passed up, and then go into Bob's Roboshack.
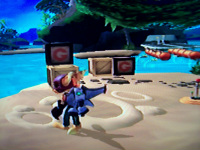
--Buy Thrusterpack from Bob
It will run you 2,000 Bolts. Now go stand on the lock, press X and then R1 to Power Slam the lock.
It will run you 2,000 Bolts. Now go stand on the lock, press X and then R1 to Power Slam the lock.
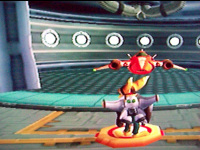
--Destroy the Blarg ships
Get into the Jet Fighter, and shoot the chains of the Blarg ships. Shooting the saucers will give you health and missiles.
You will be rewarded with the O2 Mask.
Square Button -- Guns
Circle Button -- Missiles
X Button -- Boosters
Get into the Jet Fighter, and shoot the chains of the Blarg ships. Shooting the saucers will give you health and missiles.
You will be rewarded with the O2 Mask.
Square Button -- Guns
Circle Button -- Missiles
X Button -- Boosters
--Check out the resort
Take the telporter back to the ship area. Follow the path again, and get in the water once it ends. Dive and enter the underwater cave to the left. As you come up, climb the ledges, wrench the crates, and power slam the lock.
Take the telporter back to the ship area. Follow the path again, and get in the water once it ends. Dive and enter the underwater cave to the left. As you come up, climb the ledges, wrench the crates, and power slam the lock.
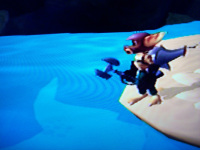
|
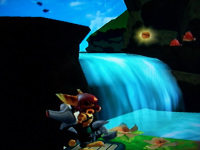
|
Cross the bridge, take out the fish, and get the boxes. Devastator the two pink aliens, swingshot across, suck cannon the fish, and get the boxes -- remember, you can power slam blue crates to open them. Jump up the first two steps, wrenching the fish. Use the Pyrocitor on the third step. Snipe the two pink aliens from here with the Devastator, and as many fish as you can with the Blaster. Then glide down for the two crates, and blast the fish off the next ledge. Get the two crates, snipe the remaining fish, and cross the river. Blow up the red crate if you haven't already, and collect the bolts. Use the blue crates to reach the ledge, and then snipe the last two fish. Jump back down for the blue crates, and swingshot up to Gold Bolt #24 and an ammo crate. Go forward and glide down below. Back-track your way up the stairs to the pool area and bust the blue crates on the ledge and behind the waterfall. Then go back to the ship area.
--Navigate the sewers
From the ship area, there will be a teleporter to the sewers in the opposite direction of the vendor. When you arrive in the sewers, get both sets of crates, and jump in the water. Dive, swim through the doorway, and Pyrocitor the ameboid ahead. Wrench the boxes and empty the pool with the Hydrodisplacer. Walk back and use the Trespasser combination (4c, 5cc, 3c) to unlock the door. Go back to re-fill the pool, and swim through to the next room. Jump up to Pyrocitor all of the ameboids, get the boxes, and use the metal detector. Climb up the ledges and get all of the crates. Use the Trespasser combination (3c, 4cc, 4c) to unlock the door. Smash all of the crates and get in the water. Blow up all the red crates and collect the bolts as you move through. Rise up at the end and Pyrocitor a bunch more ameboids. Climb the ledge, get the boxes, and unlock the door with the Trespasser combination (3c, 6c, 5cc). Go through the door to meet the inventor and get the boxes. Take the teleporter to the ship and fly to Planet Orxon.
Come Back!
a) With: Raritanium (Hoven)
For: Persuader
----------------------------------------------------------------------------------------------------------------------------------------------------------------------------------
a) Just take the teleporter down to the sewers and trade the Raritanium for the Persuader, which will give you discounts on weapons.
Planet Hoven, Bomb Factory
Objectives:
--Destroy the Planetbuster
--Buy Hydro-Pack from Ed
--Explore the Icy Wastes
Stuff:
Drone Device for 7,500 Bolts/5,000 Bolts with the Persuader (Wait To Purchase After Beating Game)
Hydro-Pack for 2,000 Bolts
Infobot for the Oltanis Orbit
Raritanium
2/2 Gold Bolts
2/2 Skill Points
--Destroy the Planetbuster
Pull out the Devastator and go get on the ship pad. Shoot down five helicopters for Skill Point #22 (Whirlybirds).
--Destroy the Planetbuster
--Buy Hydro-Pack from Ed
--Explore the Icy Wastes
Stuff:
Drone Device for 7,500 Bolts/5,000 Bolts with the Persuader (Wait To Purchase After Beating Game)
Hydro-Pack for 2,000 Bolts
Infobot for the Oltanis Orbit
Raritanium
2/2 Gold Bolts
2/2 Skill Points
--Destroy the Planetbuster
Pull out the Devastator and go get on the ship pad. Shoot down five helicopters for Skill Point #22 (Whirlybirds).
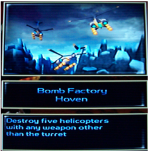
When you're done, wrench the light poles and crate next to the ship. Go get the boxes next to the vendor, and then fill up on ammo, but not visbomb or devastator ammo. Follow the path, wrench the anklebiters, and Pyrocitor the gunners. Wrench the light poles that you passed. As you're rounding the corner of the path, take a right between the trees and light poles. Wrench the poles, get the boxes, and walk toward the vertically moving platform. Pyrocitor the anklebiters that appear for Skill Point #21 (Pest Control). Afterwards, use the platform to wall jump to Gold Bolt #25 and two crates.
|
|
Once all that is done, continue down the path to Pyrocitor 4 more gunners. Get the crates, and hop on the platform acting as an elevator on the right wall. Look to the right for a ledge with crates on it, go wrench them, and then get back on the elevator. Climb the ledge into the tunnel, Pyro the gunners, and get the boxes. Jump off of the ledge ahead into a pool of water and swim into the next room. Equip the Hydrodisplacer, and empty the water capsule. Then move around the middle building to empty it into the next pad on the ground. Swim to and jump on the little circular island. Go into the small cave. If you look up the back wall, you can see the next gold bolt. For now, empty the capsule and make your way to the island next to the floating platform to empty the water. Get on the floating platform, and enter the next little cave to empty another capsule. Swim across the room to the next island and empty the water. Swim into the underwater cave ahead, and rise at the end for some boxes and Gold Bolt #26.
Swim back out, and rise to the middle platform. Collect the free bolts, stretch jump to the door, and follow the tunnel. Pull out your metal detector, hit the pole at the end, and suck some bolts out of the ground. Continue down the left side ramp. Move through each walkway and building to wrench the crates, kill the enemies, and suck up the bolts in the ground.
--Buy Hydro-Pack from Ed
At the end, purchase the Hydro-Pack for 2,000 Bolts, wrench the ammo crate on the left, and teleport back to the cave entrance.
At the end, purchase the Hydro-Pack for 2,000 Bolts, wrench the ammo crate on the left, and teleport back to the cave entrance.
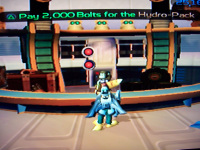
Go forward out of the tunnel, and use the diagonally moving platform to cross the icy lake. Pyrocitor the mines that appear, and then continue to use the Devastator on a helicopter. Equip the Pyrocitor and take the elevator platform up to the belt. Pyro the gunners and equip the Devastator. Move forward to shoot down another chopper on the right and wrench the crates. Wall jump up to the ledge, enter the cave, and blow up the red crate. Equip the Pyrocitor and stretch jump down the belt to get the mines as soon as possible. Then wall jump up to wrench the nanotech and three anklebiters. As you exit the cave, get the boxes on the left, and then jump on the first platform. Look back towards the cave, and double jump and glide to the mess of crates on the ledge. Then make your way across the platform obstacle. Pyrocitor the two gunners, get the boxes, and enter the building to do more of the same. Exit the building and take a left onto the belt to kill some mines and get some boxes. Go back to the door of the building, equip the Devastator, and move down the path to the turret. Shoot down the chopper that appears, save your game, and enter the turret. Your main concern is to kill the choppers so you don't die, but the objective is to shoot all the turrets on the Planetbuster. When you are done, an infobot for the Oltanis Orbit will appear. Glide down to the ship area and fill up ammo at the vendor (not visbombs).
--Explore the Icy Wastes
Near the ship, there is a doorway in the opposite direction of the vendor. Equip the Pyrocitor and go in to kill some gunners. Get the boxes and go outside. Then use the swingshot to get to the crates ahead, and then go nuts with the metal detector. When you are done, go back to the door. Hint: Double jump and glide if you loose control on the ice. Step on the green button, stretch jump to the second one on the right, and swingshot up for the third. Skate down into the door, and wall jump up, being sure to activate the buttons. Get the crates, go out the door, and swingshot across the water. Blow up the mess of crates on the right, and then swingshot between the lasers to the next room. Wrench the anklebiter and jump to the ice island to get the boxes. Jump to the other side, wrench the anklebiters, and swingshot across. Throw your wrench at the crates and then climb the icy ledges.
Double jump across the ice platforms and wrench the anklebiters. Throw your wrench to get the red crates and bolts. Next you will have to double jump and glide your way across the thin, icy, zig-zaging walkway, stepping on each of the three buttons as you go. At the end throw your wrench at the poles, get the boxes, and go talk to the driller. He will give you Raritanium, which you will want to cash in on Planet Pokitaru once you reach your ship. In this room you will find more crates on the left and a sand mouse on the right. Then go out the door and glide off of the cliff to your ship. Once you get the Persuader from Planet Pokitaru, fly to the Oltanis Orbit.
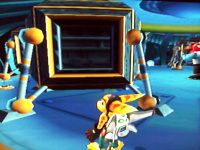
Oltanis Orbit, Gemlik Base
Objectives:
--Explore base
--Shoot down Captain Qwark
Stuff:
New Ship
Infobot for Planet Oltanis
1/1 Gold Bolts
1/1 Skill Points
--Explore base
Get the crates around and below the ship area. Shoot the light tower in front of the ship area with the Devastator, and then cross the gap. Wrench the crates and the birds. Get the boxes way ahead and the ones by the stairs, then climb the steps. Wrench the two crates and continue to wrench some birds. Use the Blaster on the green guy, use the Devastator on the light tower, and get all of the boxes. Stretch jump to the boxes on the right as you enter the opening. Wrench the crates and walk around to wrench the gunner from behind. Unlock the next door with the Trespasser combination (6c, 3cc, 5c). Stretch jump to the stairs on the right and climb them. Wrench the birds and the crates, and walk down the steps on the other side. Wrench the gunner from behind, get the boxes in the corner, and use the Trespasser combination (6c, 4c, 3c) to open the door. Equip the Blaster, climb the ledge, and stretch jump to a gutter on the left with a few green guys. Get any leftover crates or bolts, climb the steps to wrench the gunner, and get the crates next to him. Stand on the left side of the doorway and use the Devastator to shoot the light tower ahead. Stretch jump forward and wrench the enemies and crates.
Use the Visbomb Gun on the ship ahead, get the crates, and run to the other side and back. Visbomb two more ships, and then go forward. Wrench the crates, green explosives, and green guy as you move on. Get the mess of boxes on the right, and then activate the elevator. Get the crates on the left, cross the ditch, and wrench the birds and boxes. Enter the pipe and, when the acid level is low, jump to the high, middle platform. Look to the left to spot a gold bolt. After beating Qwark, return to this spot and the electric fence will not be there. For now, make your way to the doorway, wrench the crates, and use the Devastator on the three green guys ahead. Swingshot across when the acid level is low, get the bunch of crates in the back-right corner, and next to the magnestrip.
Walk along the magnestrip with timing to avoid the orange acid pool. Run up to the green guy and Hyper-Strike him. Get the boxes, and throw your wrench at the explosives -- except the one by the edge. Climb on top of it and glide down to the other side when the pool starts going down. Quickly climb the ledge, get both sets of boxes, and activate the elevator. Wrench the birds and take a right. Wrench the three birds and three boxes. Climb the steps to reveal a vendor. Look back off of the steps and use the Devastator on the light tower in the window. Then get the boxes, fill up on ammo if you need it, and then go bak to the steps near the elevator. Visbomb the ship ahead and go in. Climb the green explosives to reach the crates on both sides, and then go on. Throw your wrench at the green explosives to kill the birds and then get the boxes on the right. Afterwards, take a right to get a bunch of boxes, and then use the Trespasser combination (6c, 4c, 3c) to unlock the door. Throw your wrench at the explosives, kill the gunners, and pull out the Metal Detector. Pull up loose bolts as you make your way around the corner.
Use the Devastator on the two green guys, wrench the crates next to you, and hop down to wrench a few birds. Retreat back to the ledge when the two ships appear, and then shoot them down with visbombs. Hook left as you get off the ledge for some crates, and then go in the direction of the ships for two more sets. On the right wall, there will be three square sniper holes. Shoot the gunners at the end of them with the Devastator. Climb the ledge ahead and enter the fenced in area. Break the boxes and hug the right wall as you move forward to collect the bolts from the gunners. Activate the elevator on the left to be taken into an ambush. First thing you want to do is ignore the enemies as you run around to kill the machines that reproduce the birds. The green guys will kill a lot of the birds trying to kill you. When all of the machines are destroyed, Pyrocitor the remaining enemies. Then collect the bolts and get any boxes. Throw your wrench to destroy the red cargo-ship hanging from the ceiling by the small window. Then exit using the elevator. Climb the steps to find Captain Qwark.
--Shoot down Captain Qwark
Before fighting Qwark, pause the game and exit the fight. Break all of the boxes in the area, and then enter the jet fighter.
Begin by shooting guns and missiles at his engines, using your boosters to dodge the missiles and mines. When Qwark loses half his health, fighters will appear. Shoot them down and collect the health and ammo from them. Then finish Qwark off.
You will be rewarded with a new ship with an infobot for Planet Oltanis.
Wrench the crates around the ship and then pull out the Metal Detector for some bolts along the strip and around the building. Afterwards wall jump up near the front of the building, and ride the elevator up to the Gold Weapon Room. DO NOT BUY ANYTHING. They are expensive and virtually useless against Chairman Drek at the end.
--Explore base
--Shoot down Captain Qwark
Stuff:
New Ship
Infobot for Planet Oltanis
1/1 Gold Bolts
1/1 Skill Points
--Explore base
Get the crates around and below the ship area. Shoot the light tower in front of the ship area with the Devastator, and then cross the gap. Wrench the crates and the birds. Get the boxes way ahead and the ones by the stairs, then climb the steps. Wrench the two crates and continue to wrench some birds. Use the Blaster on the green guy, use the Devastator on the light tower, and get all of the boxes. Stretch jump to the boxes on the right as you enter the opening. Wrench the crates and walk around to wrench the gunner from behind. Unlock the next door with the Trespasser combination (6c, 3cc, 5c). Stretch jump to the stairs on the right and climb them. Wrench the birds and the crates, and walk down the steps on the other side. Wrench the gunner from behind, get the boxes in the corner, and use the Trespasser combination (6c, 4c, 3c) to open the door. Equip the Blaster, climb the ledge, and stretch jump to a gutter on the left with a few green guys. Get any leftover crates or bolts, climb the steps to wrench the gunner, and get the crates next to him. Stand on the left side of the doorway and use the Devastator to shoot the light tower ahead. Stretch jump forward and wrench the enemies and crates.
Use the Visbomb Gun on the ship ahead, get the crates, and run to the other side and back. Visbomb two more ships, and then go forward. Wrench the crates, green explosives, and green guy as you move on. Get the mess of boxes on the right, and then activate the elevator. Get the crates on the left, cross the ditch, and wrench the birds and boxes. Enter the pipe and, when the acid level is low, jump to the high, middle platform. Look to the left to spot a gold bolt. After beating Qwark, return to this spot and the electric fence will not be there. For now, make your way to the doorway, wrench the crates, and use the Devastator on the three green guys ahead. Swingshot across when the acid level is low, get the bunch of crates in the back-right corner, and next to the magnestrip.
Walk along the magnestrip with timing to avoid the orange acid pool. Run up to the green guy and Hyper-Strike him. Get the boxes, and throw your wrench at the explosives -- except the one by the edge. Climb on top of it and glide down to the other side when the pool starts going down. Quickly climb the ledge, get both sets of boxes, and activate the elevator. Wrench the birds and take a right. Wrench the three birds and three boxes. Climb the steps to reveal a vendor. Look back off of the steps and use the Devastator on the light tower in the window. Then get the boxes, fill up on ammo if you need it, and then go bak to the steps near the elevator. Visbomb the ship ahead and go in. Climb the green explosives to reach the crates on both sides, and then go on. Throw your wrench at the green explosives to kill the birds and then get the boxes on the right. Afterwards, take a right to get a bunch of boxes, and then use the Trespasser combination (6c, 4c, 3c) to unlock the door. Throw your wrench at the explosives, kill the gunners, and pull out the Metal Detector. Pull up loose bolts as you make your way around the corner.
Use the Devastator on the two green guys, wrench the crates next to you, and hop down to wrench a few birds. Retreat back to the ledge when the two ships appear, and then shoot them down with visbombs. Hook left as you get off the ledge for some crates, and then go in the direction of the ships for two more sets. On the right wall, there will be three square sniper holes. Shoot the gunners at the end of them with the Devastator. Climb the ledge ahead and enter the fenced in area. Break the boxes and hug the right wall as you move forward to collect the bolts from the gunners. Activate the elevator on the left to be taken into an ambush. First thing you want to do is ignore the enemies as you run around to kill the machines that reproduce the birds. The green guys will kill a lot of the birds trying to kill you. When all of the machines are destroyed, Pyrocitor the remaining enemies. Then collect the bolts and get any boxes. Throw your wrench to destroy the red cargo-ship hanging from the ceiling by the small window. Then exit using the elevator. Climb the steps to find Captain Qwark.
--Shoot down Captain Qwark
Before fighting Qwark, pause the game and exit the fight. Break all of the boxes in the area, and then enter the jet fighter.
Begin by shooting guns and missiles at his engines, using your boosters to dodge the missiles and mines. When Qwark loses half his health, fighters will appear. Shoot them down and collect the health and ammo from them. Then finish Qwark off.
You will be rewarded with a new ship with an infobot for Planet Oltanis.
Wrench the crates around the ship and then pull out the Metal Detector for some bolts along the strip and around the building. Afterwards wall jump up near the front of the building, and ride the elevator up to the Gold Weapon Room. DO NOT BUY ANYTHING. They are expensive and virtually useless against Chairman Drek at the end.
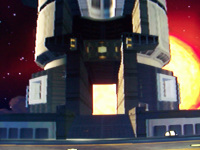
Go back down and fly to another planet and come back. Your ship will return to its original position. Use the Visbomb Gun to destroy the rest of the red cargo-ships in the level for Skill Point #23 (Sitting Ducks).
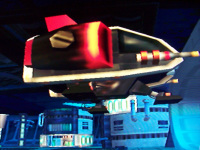
|
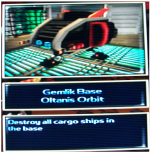
|
Lastly, replay the level up to the point with the green acid and platforms, and get Gold Bolt #27 on the left of the middle platform (the electric fence will be gone). Feel free to fill up on all of your ammo before leaving for Planet Oltanis.

Planet Oltanis, Gorda City Ruins
Objectives:
--Find survivors of the Blarg attack
--Buy Infobot from scrap merchant
--Search the destroyed city
--Purchase Gadgetron PDA from 'Steve'
Stuff:
Tesla Claw for 40,000 Bolts/30,000 Bolts with the Persuader (Recommended)
Morpharay
Infobot for Planet Quartu for 2,000 Bolts
Gadgetron PDA for 1,000 Bolts
4/4 Gold Bolts
2/2 Skill Points
--Find survivors of the Blarg attack
Before starting, here are a few notes:
1. You should have enough bolts to purchase the Tesla Coil, but make sure you have the Persuader to save yourself 10,000 bolts. However, you may spend the money on the Ultra Nanotech on Planet Orxon if you really want to. I recommend waiting to purchase the health because the next few levels are easy enough that you do not need it. The Drone Device is a much cheaper alternative if you still desire more protection.
2. Because of a Skill Point (Shattered Glass) you must have a sufficient amount of time to play through half the level without dieing. If you die or quit, the streetlights will respawn, forcing you to repeat the level to break the streetlights.
Ok, let's begin. Go to the vendor and purchase the Tesla Claw for 30,000 Bolts with the Persuader, and then buy ammunition to fill it. Second, pull out your Visbomb Gun and shoot down three marauding Blarg ships for Skill Point #25 (Blast 'Em). Next, throw your wrench at all the blue streetlights around the ship. Break the crates near the ship, fill up on ammo at the vendor, and then get on the yellow elevator platform.
--Find survivors of the Blarg attack
--Buy Infobot from scrap merchant
--Search the destroyed city
--Purchase Gadgetron PDA from 'Steve'
Stuff:
Tesla Claw for 40,000 Bolts/30,000 Bolts with the Persuader (Recommended)
Morpharay
Infobot for Planet Quartu for 2,000 Bolts
Gadgetron PDA for 1,000 Bolts
4/4 Gold Bolts
2/2 Skill Points
--Find survivors of the Blarg attack
Before starting, here are a few notes:
1. You should have enough bolts to purchase the Tesla Coil, but make sure you have the Persuader to save yourself 10,000 bolts. However, you may spend the money on the Ultra Nanotech on Planet Orxon if you really want to. I recommend waiting to purchase the health because the next few levels are easy enough that you do not need it. The Drone Device is a much cheaper alternative if you still desire more protection.
2. Because of a Skill Point (Shattered Glass) you must have a sufficient amount of time to play through half the level without dieing. If you die or quit, the streetlights will respawn, forcing you to repeat the level to break the streetlights.
Ok, let's begin. Go to the vendor and purchase the Tesla Claw for 30,000 Bolts with the Persuader, and then buy ammunition to fill it. Second, pull out your Visbomb Gun and shoot down three marauding Blarg ships for Skill Point #25 (Blast 'Em). Next, throw your wrench at all the blue streetlights around the ship. Break the crates near the ship, fill up on ammo at the vendor, and then get on the yellow elevator platform.
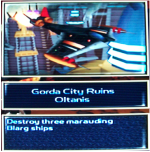
Bust the blue lights near the taxi and the two ahead next to the crates. Wrench the crates and Tesla Claw the two robots below the ledge. Jump down and walk forward to claw the robots armed with tesla claws (burst fire your tesla claw). There is health on the right wall and crates on the left and ahead. Before climbing up the next ledge, visbomb the bomber. Go up the stairs, and suck in the small robots to fire them at the tesla robots. Get the crates in the right corner and ahead, and go up to the ledge and back down (R1). Visbomb the bomber, claw the tesla robots, and get the leftover crates. Climb the ledge, get the boxes, and ride the grind rail into the ambush. Claw your way out and continue for some boxes. Swingshot up the back wall for boxes, a sand mouse, and Gold Bolt #28.
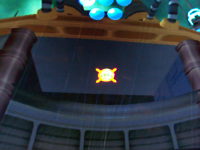
|
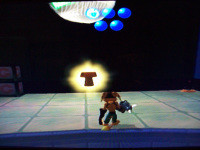
|
Jump down and climb the yellow ledge, but do not walk forward. Visbomb the bomber from the beginning of the ledge, continue, and then claw the robot that appears. Climb the ledges by using the solid left ledge (so you don't fall down), claw the small robots, and get the crates. Jump up to the next ledge, shoot the turret and continue. Claw the small robots and jump on the grind rail. Dodge the robot's beams and get on the left rail when the camera turns forward, jump the mine, and move over 2 rails, avoiding the next mine.
--Buy Infobot from scrap merchant
Pay the 2,000 Bolts for the infobot to Planet Quartu, break the boxes, step on the red button, and jump down.
--Purchase Gadgetron PDA from 'Steve'
Next, walk up the magnestrip near the yellow elevator platform and press the button. Ignore the crate on the ice, climb the stairs, and skate straight ahead to make it to the door because of the wind. Navigate the magnestrip, throwing your wrench to destroy any mines before crossing their path. Get on the ice on the right, jump over the gaps and beams, and cross a second magnestrip. Navigate a second ice obstacle and climb the ledges. Walk to the next magnestrip, throw the wrench at the crates on the left and then at the mines as you move along. At the end, visbomb the bomber and then walk forward to claw a tesla robot. Get the two sets of crates and jump down to the ledge on the right for ammo and Gold Bolt #29.
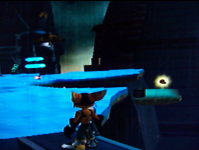
Slowly move as you use the metal detector to get a few bolts, and then continue in the direction of the tesla robot's sewer cap. Jump to grap the ledge, but DO NOT JUMP UP ONTO THE ICE. Keep moving way to the right to get Gold Bolt #30.
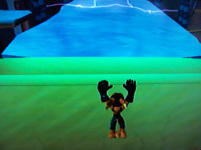
|
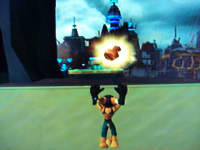
|
Spin in a small circle near the edge in order to fall off and grab the ledge. Move to the left, jump up onto the ice and over the beams. At the end, meet 'Steve' and buy the Gadgetron PDA for 1,000 Bolts. Wrench both sets of crates and exit using the magnestrip.
--Search the destroyed city
If you haven't noticed, the past two sections did not have any blue streetlights to destroy, which is why we did those first.
Now it is important to not die or quit in order to receive the skill point at the end. If you died, throw your wrench at the blue lights near the ledge, by the taxi, and around the ship.
If you need ammo, go to the vendor. Next, take the taxi to the upper city. Jump off, claw the turret, and break the two streetlights. Visbomb the sentry robot with the searching light, shoot the turrets ahead with the Devastator, and then walk across. Tesla Claw the small laser robots and the two machines producing them ahead. Collect the bolts, swingshot across at the appropriate timing, and run forward to claw all of the enemies. Wrench the crates and two streetlights, and then climb the ladder -- do not walk forward. Visbomb the first searchlight robot and quickly jump back down. Climb back up the ladder and claw the rest of the enemies as you move forward. Collect all of the bolts, get the crates at the end, and use the swingshot to get onto the moving platform that flies by -- if you short it, try to re-launch the swingshot immediately.
Swingshot into the opening on the other side of the building, and blow up the crates on the right wall. An complete ambush of turrets and searchlight robots lay ahead, so the best thing to do is move through without being seen. Walk through a gap in the searchlights to the middle, and then again to the other door. Get the health ahead if you need it, and then jump up to the platform ahead. Dodge the turret fire as you jump across the platforms, wrench the turret, and swingshot all the way to a third taxi. Stay on the taxi and claw all the enemies as it moves around. Double jump to the island and use the metal detector to get some bolts. Climb the ladder to claim the Morpharay and jump on the grind rail to be taken back to the ship area.
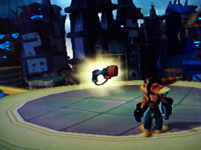
When you arrive, a bomber will blow up the lightning bolt statue in the middle. Go step on the red button and swingshot across the targets that appear. At the end, look off of the edge on the left side to identify a flying robot carrying a versa-target. Swingshot to the robot (multiple times in the same jump if necessary) in order to get to the yellow versa-target ahead. Break the next two streetlights on the right and look off of the ledge ahead. This time you must use the yellow target to get to the robot's target, so time your jump appropriately. Keep swingshoting to the same robot until the next versa-targets ahead. Then use the next robot to get across to the second yellow target and dangle there. When a different robot flies underneath you, let go and swingshot to the island ahead. Here you will find Gold Bolt #31 and the last of the streetlights for Skill Point #24 (Shattered Glass). Take the taxi back to the ship and fly to Planet Quartu.
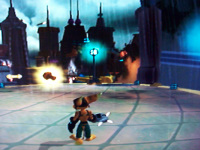
|
|
Planet Quartu, Robot Plant
Objectives:
--Find out more about the Ultra-Mech
--Destroy the Ultra-Mechs
--Explore the coolant system
Stuff:
Bolt Grabber
Infobot for Planet Kalebo III
0/2 Gold Bolts
0/0 Skill Points
--Explore the coolant system
Break the boxes on the right, and get the ones by the vendor, and climb the ladder. Dive in the water and swim through the three rings quickly with R1. Follow the path, avoiding the lasers. Rise up and go forward to press a button. Go forward into the tunnel slightly to the left, and swim to the right in the next room to get the three rings. In the room room after that, go straight through and then into the tunnel. Go left to get the three rings in the room after the tunnel. Rise up at the end and get the Bolt Grabber and some boxes. Then go out the pipe to the ship area.
--Find out more about the Ultra-Mech
Take the ramp down and Tesla Claw the enemies. Get the two sets of boxes on the edges and the ones by the door. Use the metal detector to get some loose bolts, and then swingshot across the broken bridge. Follow the path, clawing the enemies and getting the boxes. You will come to a large area with two doors ahead, but one is locked and contains a gold bolt and A TON of crates. To unlock it, you will need to come back with the Codebot from the Veldin Orbit. For now, use the metal detector once more, and then move into the open doorway. Kill the enemies, break the boxes, and go talk to the scientist.
Take the ramp down and Tesla Claw the enemies. Get the two sets of boxes on the edges and the ones by the door. Use the metal detector to get some loose bolts, and then swingshot across the broken bridge. Follow the path, clawing the enemies and getting the boxes. You will come to a large area with two doors ahead, but one is locked and contains a gold bolt and A TON of crates. To unlock it, you will need to come back with the Codebot from the Veldin Orbit. For now, use the metal detector once more, and then move into the open doorway. Kill the enemies, break the boxes, and go talk to the scientist.

--Destroy the Ultra-Mechs
Go to the platform and Transform into Giant Clank.
Square Button -- Punch
Circle Button -- Missiles
Triangle Button -- Power Attack (Light in left hand corner must be green)
X Button -- Jump
Walk around to kill all of the enemies and destroy any barriers or choppers. When you've made it back to the bridge, enter the arena on the right. Destroy the Ultra-Mechs and choppers that appear. Upon destroying the Ultra-Mechs, the scientist will give you an infobot for Planet Kalebo III. Go back to the ship and fly there.
Planet Kalebo III, Gadgetron Site
Objectives:
--Find new equipment
--Get past the Blarg
--Win the Hoverboard race
--Ride the Grind Rail
Stuff:
Map-o-matic
Hologuise
2/2 Gold Bolts
2/2 Skill Points
--Ride the Grind Rail
--Find new equipment
--Get past the Blarg
--Win the Hoverboard race
--Ride the Grind Rail
Stuff:
Map-o-matic
Hologuise
2/2 Gold Bolts
2/2 Skill Points
--Ride the Grind Rail
Veldin Orbit, Drek's Fleet
Stuff.
Planet Veldin, Kyzil Plateau
Stuff.
